
The DFM report is approved, the mold design is signed off, and steel is being cut — and then the change arrives. A customer asks for a thicker wall near a mounting boss. A mating part grows by a few millimetres. A test result forces a different resin. The question is no longer whether the change is a good idea. It is what the change will cost now, what it will delay, and how to get it approved without losing control of the launch.
A design change after tooling has started costs more at every stage it passes through, because each stage turns part of the design into something physical: first a drawing, then a mold design, then cut steel, then trial parts, then approved production. The later the change arrives, the more of that work has to be undone and redone — and the more that must be re-approved before production can start again.
How to use this guide: use the stage table to price the change you are facing, the steel-safe section to judge whether your change is cheap or expensive, and the ECO checklist to write the change request so nothing is decided by memory.
What counts as a design change after tooling has started?
A design change is any revision to the released part definition after the tooling project has begun. It is not only a new shape. The common types are:
- Geometry: a wall thickness, rib, boss, hole, snap feature, or overall dimension changes.
- Material: the resin grade or family changes, which changes shrinkage, and shrinkage changes what the tool must be.
- Tolerance: a limit tightens or loosens, which changes what the tool and the inspection must prove.
- Surface and appearance: a texture, gloss level, colour, or cosmetic zone changes, which can change polishing, draft, and the visual standard.
- Tooling-driven: a gate moves, the parting line moves, or an ejection feature changes, which changes fill, venting, and appearance.
A change is "after tooling has started" from the moment the mold design work begins, not from the moment steel is cut. That matters because the cost clock starts earlier than most buyers expect: a change made while the mold design is still on screen costs design hours. The same change made after the steel is cut costs machining, and possibly a new insert. The same change made after the first trial costs machining plus a new trial plus re-approval. And the same change made in production costs all of that, plus the parts already made.
The document that controls all of this is the engineering change order, usually shortened to ECO. An ECO is a written change request with a number, a revision, a reason, and named approvers. It is the difference between a change and a conversation: a change made by email or chat, with no revision number attached, is how the wrong revision gets molded. Every change in this guide is assumed to travel through a written ECO. The checklist for what that document must contain is in the section below.
Why does the same change cost more later?
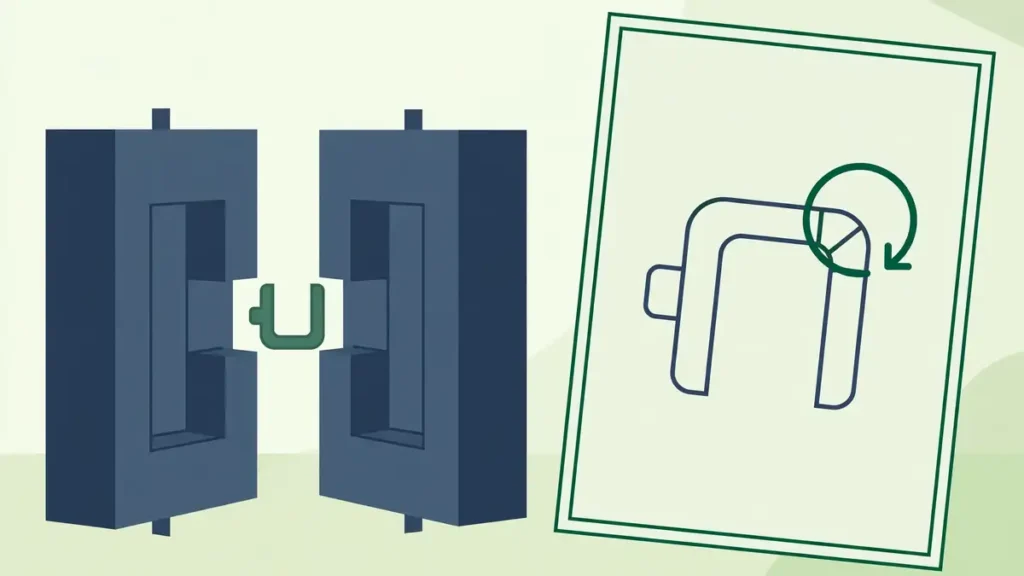
An injection mold is the negative of the part. Every feature of the part is a surface in the steel, cut to a size that already accounts for how the chosen resin shrinks as it cools. Changing the part therefore means changing the steel, and steel can only be changed in two directions: it can be removed, or it can be added back.
Removing steel is ordinary machining. A cavity can be milled, ground, or cut by EDM (electrical discharge machining, a process that shapes hardened steel with controlled electrical sparks) to make a part feature larger, a wall thicker, or a clearance wider. Adding steel back is the hard direction. It usually means welding material onto the cavity surface and then re-machining it, and welding on a mold surface is a repair, not a design choice: the weld can introduce porosity and surface inconsistency, and the re-machined area may not match the surrounding steel in hardness or polish. That is why the practical rule of tooling is simple — steel can be taken away, but it is difficult and expensive to put back.
The scale of the problem is stated plainly in the Protolabs Network (Hubs) injection molding design guide: "After a mold is manufactured, it’s very expensive to modify. Design changes usually require the creation of a new mold from scratch." That is the worst case, and it is not the usual case — most changes can be handled by modifying the existing tool. But the guide’s warning is about the direction of travel: every stage that passes makes modification harder, and the same guide notes that when design changes are required, the turnaround time increases accordingly. The cost of a change is therefore not a property of the change alone. It is a property of the change and the stage it arrives at, together.
There is a second reason the cost rises. Each stage produces evidence that the next stage depends on: the DFM report, the approved mold design, the trial samples, the dimensional report, the approved first article. A change invalidates the evidence behind it. A dimensional report measured on parts from the old revision does not prove anything about the new one. So the price of a late change is never only the machining. It is the machining plus the re-trial plus the re-measurement plus the re-approval — and the launch delay while all of that happens.
What does a change cost at each stage?
The table below is the decision tool for this article. The cost columns are qualitative on purpose: the real price of a change depends on the size of the tool, the number of cavities, the steel, and the size of the area affected, and no table can quote that. What the table can do is show the pattern — what each stage touches, what kind of cost it creates, and what has to be signed again before production can restart.
| Change stage | What the change typically touches | Typical time and money impact (qualitative) | What must be re-approved |
|---|---|---|---|
| Before DFM freeze | The part drawing and the DFM review only | None, or a few hours of design and review time | The revised drawing and the updated DFM report |
| After mold design, before steel is cut | The mold design files, cooling and ejection layout, and the steel order | Design hours and possibly a revised steel order; no machining rework | The revised mold design and the updated DFM report |
| After steel is cut, before T1 | The cavity and core steel, inserts, and any affected slides or lifters | Machining time (CNC, EDM, polishing) and possible welding if steel must be added back; the trial schedule moves | The revised mold design, the affected tool drawings, and the trial plan |
| After T1, before production release | The steel, the trial results, and the inspection evidence | Machining plus a new trial, new samples, and a new dimensional report | The revised drawing, the tool correction record, the new trial samples, and the first-article evidence |
| In production | The steel, the approved process, the inspection records, and the parts already made | Machining plus a new trial and re-approval, plus sorting or scrapping of affected stock and a possible delivery delay | Everything above, plus the process window, the inspection plan, and the production release itself |
Three rows deserve a closer look.
Before the DFM freeze, a change is nearly free. DFM — design for manufacturing — is the review that checks whether the part can be molded as drawn: wall thickness, draft, ribs, gates, vents, ejection, and the risks the drawing does not show. A change made while that review is still open is a change to a document. It costs the time to re-check the affected features and update the report. This is the cheapest stage by a wide margin, and it is the reason a design-freeze point should be agreed in writing before tooling starts. The manufacturer guide on choosing a mold manufacturer makes the same point from the supplier side: if the design is still changing, say so in the brief and ask for a preliminary quotation with stated assumptions, rather than a firm price on a moving target.
After steel is cut, the direction of the change decides the cost. A change that removes steel from the mold — making a wall thicker, a clearance wider, a feature larger — is machining work on an existing surface. A change that adds steel back — making a wall thinner, a feature smaller, a hole tighter — usually means welding and re-machining, or a new insert. The next section explains this distinction in full, because it is the single most useful thing a buyer can know about a change.
After T1, the evidence has to be rebuilt, not just the steel. T1 is the first trial of a finished mold: the first parts the tool produces, showing whether it fills, cools, and ejects and whether the first parts are close to the drawing. A change after T1 means the trial that proved the tool no longer proves it. The new trial must produce new samples, and those samples need a new dimensional report against the new revision. The guide to T1 sample and first-article approval sets out what that evidence package must contain — part and sample identity, dimensional results, material and process context, visual and functional checks, and a disposition for every deviation — and a post-change trial must supply the same package again for the features the change touched. A correction that is not followed by a trial is a correction nobody has verified.
In production, one more cost appears that no earlier stage has: the parts already made. A change to a running tool can mean sorting finished stock, scrapping parts made to the old revision, and re-scheduling deliveries. That is why a change in production is also a commercial decision, not only an engineering one, and why it should be priced with the same discipline as the tooling change itself. The project budget guide lists engineering changes as a commercial-risk cost block for exactly this reason: they belong in the budget as a contingency, not as a surprise.
Steel-safe vs steel-cut: which changes are cheap and which are expensive?
"Steel-safe" is a design strategy, not a type of steel. A feature is designed steel-safe when the mold is deliberately cut with extra steel left in place, so that the feature can be adjusted later by removing steel. The concept is explained in Xometry’s guide to injection molding tolerances: tools are often made "steel-safe," which means critical dimensions or features can be adjusted through extra milling, because the additional material allows fine-tuning of the tool by machining it out if the finished dimensions are not within tolerance. The guide gives the example of a tightly toleranced hole: the tool is designed with the core pin at the wider side of the tolerance, so that if the hole needs adjusting, the pin is machined thinner and the hole becomes smaller.
Plastics Today makes the same point from the designer’s side: details that cannot be confidently reproduced — snap fits, alignment features, interlocking parts — are often designed steel-safe, meaning the feature is detailed with enough clearance to allow a tool maker to easily machine away steel in the mold to tighten up the clearances after initial test shots are molded. The article is blunt about the alternative: most molders prefer these precautions to avoid welding material back into the mold, and welding always compromises tooling quality, is expensive, and delays production startup.
That gives the buyer a simple test for any proposed change. Ask which direction the steel moves:
- Cheap direction — the change removes steel from the mold. Making a wall thicker, enlarging a hole or a clearance, deepening a pocket, or widening a slot. The toolmaker machines the cavity or core, polishes the affected surface, and runs a trial. This is the normal work of mold correction, and it is the work a steel-safe design was planned for.
- Expensive direction — the change adds steel back to the mold. Making a wall thinner, shrinking a feature, tightening a hole, or reducing a clearance. The toolmaker must weld material onto the cavity or core surface, re-machine it, and re-polish it — or make a new insert for the affected area. Welding is slower, less predictable, and harder to polish to the original surface standard, which is why it is priced as a repair rather than an adjustment.
- Expensive for a different reason — the change moves a boundary. Moving a gate, moving the parting line, or adding a feature that crosses the parting line affects fill, venting, and ejection at once. These changes are rarely a matter of machining one surface; they usually mean re-cutting an insert or a cavity section, and they always mean a new trial with a new fill pattern to check.
- Expensive for a different reason again — the change adds a mechanism. Adding an undercut, a side action, or a slide means adding moving steel to a tool that was not designed for it. That is usually a new insert or a new cavity set, not a modification.
The practical consequence is that the cheapest time to think about change is before the steel is cut. When the mold design is reviewed, ask which critical dimensions are held steel-safe and in which direction. A dimension that might need to move should be held on the side that lets the toolmaker remove steel to correct it, not on the side that would need welding. That conversation costs nothing at the design review and can save a welding job after the first trial. It is also worth agreeing, at the same review, which changes would need a new insert rather than a modification — so that when a change arrives, the answer is already written down instead of being negotiated under launch pressure.
What must a written change request (ECO) contain?
A change request that cannot be traced is a change that cannot be approved. The checklist below is the minimum a written ECO should contain. Each item answers a question that will otherwise be asked later, when the answer is harder to find.
| ECO item | What it must state | Why it matters |
|---|---|---|
| Change number and date | A unique ECO number and the date it was raised | Links the change to the drawing, the trial, and the invoice |
| Part and revision | Part name and number, the current revision, and the new revision | Prevents the old revision from being molded after the change |
| Reason for the change | The problem or requirement behind it, in one or two sentences | Lets the toolmaker judge whether the change solves the problem or creates a new one |
| Affected features | Every feature the change touches, marked on the drawing | Stops a change to one feature from silently affecting a mating feature |
| Old vs new | The old value and the new value for every changed dimension, tolerance, material, or note | Makes the change checkable — a reviewer can verify each value instead of trusting a summary |
| Files attached | The revised STEP file and the revised 2D drawing, with changes highlighted | The toolmaker works from files, not from a description of files |
| Tooling stage | The current stage: DFM, mold design, steel cut, T1, or production | Decides the cost and the re-approval path from the stage table above |
| Cost and schedule impact | The quoted cost of the change and the effect on the trial and delivery dates | Lets the buyer approve the change as a commercial decision, not only a technical one |
| Approvers | The named people who approve the change on the buyer side and on the supplier side | A change with no named approver is a change nobody owns |
| Trial and inspection evidence | What trial and what inspection the change requires, and what evidence must be supplied | Connects the change to the re-approval it needs before production restarts |
| Effect on other items | Whether the change affects other parts, assemblies, packaging, or documentation | A change to one part can change the assembly it fits into |
Two habits make the ECO work in practice. First, keep one controlled revision set: the drawing revision, the CAD revision, the approved sample, the mold revision, and the packaging revision should all carry the same change number, so that a question about any one of them can be answered from the others. Second, never approve a change verbally and write it down later. The approval should be a signature — or a written confirmation — on the ECO itself, before the toolmaker starts cutting. A change approved after the machining is a change the buyer has already paid for without deciding to.
How is a change approved and re-validated?
Approval has two parts, and they are not the same decision. The first is the commercial approval: the buyer accepts the cost and the schedule impact stated on the ECO. The second is the technical approval: after the tool is corrected, the new parts are checked against the new revision and approved before production restarts. Both need to be written down, and neither should be assumed from the other.
The re-validation should be sized to the change, not copied from the original approval. A narrow correction — one dimension on one feature — can be re-validated by a targeted recheck: the corrected feature measured on samples from each cavity it affects, plus a visual check of the surfaces the machining touched. A broad change — a new material, a moved gate, a changed wall thickness — needs a fuller repeat: a new trial, a dimensional report against the new revision, and a check of the features the change could have affected indirectly, such as flatness, fit, or appearance. The triggers for a new trial should be written down before the first correction arrives, when it is cheapest to agree them. The T1 approval guide lists the usual triggers — a drawing revision, a resin grade change, a cavity repair, a gate or cooling change, a texture change, a tool relocation, a revised process setting — and a post-change trial is the same list applied to the change in front of you.
One rule covers the grey area: if the change touched a feature, that feature is re-measured. If the change touched the process — a gate, cooling, or the material — the process evidence is re-established too, because a process change can move dimensions that were never drawn. And the approval record should name the revision it approves. An approval that does not name a revision is an approval of nothing in particular.
What if the change is a material change?
A resin change is a design change with a hidden extra step. A mold is cut to a size that already compensates for the shrinkage of the resin it was designed for: the cavity is made larger than the part by the amount the resin will shrink as it cools. A different resin shrinks by a different amount, so a cavity cut for one resin will make a different-sized part from another. That is why a resin change after tooling is rarely a drop-in substitution, even when the two resins look similar on a datasheet.
The material selection guide states the point directly: a mold is designed around the shrink behaviour of a particular resin, so material changes after tooling are not automatically risk-free. Before approving a resin change, the buyer should ask three questions: what is the shrinkage difference between the old grade and the new grade, and in which direction; which dimensions does that difference move, and by how much; and does the tool have enough steel-safe room to absorb the difference, or does the cavity need re-cutting? The answers decide whether the change is a trial with a new resin or a tool modification with a new resin — two very different prices. The material selection guide explains how to compare grades on shrinkage, processing, and the tool implications before the grade is frozen, and the same checks apply when a grade is changed after the tool exists.
A resin change also re-opens the compliance questions. A flammability rating, a food-contact statement, or a chemical-resistance claim belongs to a specific grade, not to a resin family, and the documents for the new grade must be checked before the change is approved — not discovered missing after the first parts are molded.
How do you keep the launch date when a change arrives?
A change and a launch date are in tension, and the buyer has three honest options. The first is to accept the delay and the cost, and move the date. The second is to defer the change: run the launch with the current revision and introduce the change as a second revision, once production is running and the tool can be modified between orders. The third is to split the change: approve the part of it that can be done by removing steel, and defer the part that needs welding or a new insert.
Which option is right depends on what the change protects. A change that fixes a functional failure — a part that does not fit, a boss that breaks, a seal that leaks — is not deferrable, and the launch date should move rather than the product shipping broken. A change that improves the product — a slightly thicker wall, a cleaner appearance, a nicer feature — is often deferrable, and the launch date may be worth more than the improvement. The test is simple: if the part cannot do its job without the change, make the change. If the part can do its job and the change makes it better, ask whether the improvement is worth the delay and the rework. That is a product decision, and it should be made by the people who own the product — not by the tooling schedule alone.
Whatever the decision, write it on the ECO. A deferred change that is not recorded is a change that will be forgotten, and a change made quietly, without a number or an approval, is the one that produces parts to the wrong revision.
Frequently asked questions
Who pays for a design change after tooling has started?
It depends on who caused the change and what the quotation and the agreement say. A change the buyer requests is normally the buyer’s cost; a correction the supplier needs because the tool does not meet the agreed drawing is normally the supplier’s responsibility. The distinction should be written into the quotation before tooling starts — which changes are included in the tooling price, how a buyer-requested change is priced, and who pays for a correction. If the quotation is silent, the ECO is where the cost is agreed, before the work starts.
Can a small change be free?
A change made before the DFM freeze can be close to free, because it is a change to a document. A change made after steel is cut is rarely free, because it is machining time, a new trial, and new inspection evidence. If a supplier offers a post-tooling change for free, ask what is included: the machining, the trial, and the re-inspection, or only the machining. A free change that skips the trial is not a saving.
What happens if a change is found during production?
The same process applies, with one addition: contain the stock first. Identify which parts were made to the old revision, separate them from parts made to the new one, and agree what happens to each group before the tool is corrected. Then raise the ECO, correct the tool, run the trial, and re-approve — in that order. A correction made while affected stock is still shipping is how the wrong revision reaches the customer.
Send the revised drawing with the change marked and the revision noted
The cheapest change is the one that arrives with everything the toolmaker needs to price it. Send the inquiry through the contact page and include the STEP file and the 2D drawing at the new revision with the changes highlighted, the reason for the change, the features it affects, the current tooling stage, and the timing the launch needs. The contact form has no file upload, so send CAD files by email after the initial reply.
A change request that names its revision, its reason, and its stage can be priced in one round. A change described as "please update the design" cannot — and the rounds it takes are the delay the launch cannot afford.