
Making parts that are both hard and soft is tough. If you use just one material, your prototype might fail or break. But combining tough PLA and flexible TPU in one 3D print solves this problem easily and perfectly.
Multi-material 3D printing lets you combine rigid PLA and flexible TPU in a single part. PLA provides strong, stiff structures, while TPU adds soft, bendable joints or grips. Together, they create functional prototypes that look and act like real final products, saving you time and money during product testing.
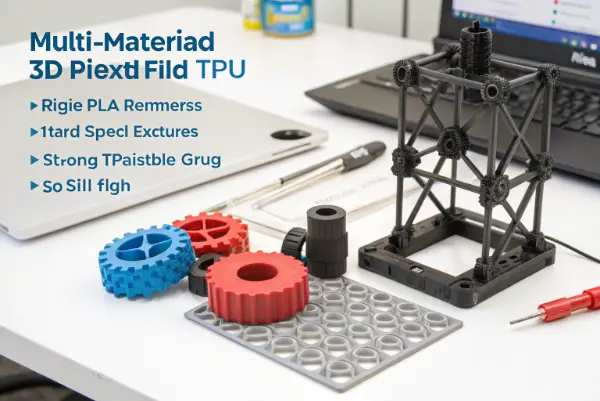
You might think mixing a hard plastic with a rubbery one is a headache. I used to think the exact same thing. But once you know how these two materials work together, a whole new world of design opens up for you. Let us look closer at how you can make this work for your next big project.
What Makes PLA and TPU the Perfect Match for 3D Printing?
Choosing the right materials is hard. If you pick the wrong ones, they will not stick together, and your part will fall apart. PLA and TPU stick to each other very well, making them a great team.
PLA is a stiff plastic that gives your part a strong frame. TPU is a flexible material that acts like rubber. When printed together, the heat melts them just enough to form a strong bond. This means you do not need glue or screws to hold the hard and soft parts together.
Let us break down why this combination works so well.
Understanding Material Strengths
Every material has a special job. PLA (Polylactic Acid) is the most common 3D printing plastic in the world. It is easy to print, holds its shape, and does not shrink much. However, it is very stiff and can crack if you hit it hard. TPU (Thermoplastic Polyurethane) is completely different. It bends, stretches, and absorbs shocks. But building a whole part out of TPU can make it too floppy and weak.
The Magic of Heat Bonding
When you print with both at the exact same time, the magic happens. The hot nozzle melts the TPU right onto the PLA. Because their melting temperatures are close, they mix slightly where they meet. This creates a solid grip. I remember testing my first PLA-TPU part. I tried to pull the soft rubber grip off the hard plastic handle. I pulled as hard as I could, but it stayed perfectly in place.
Comparing PLA and TPU
Let us look at a simple table to compare them.
| Feature | PLA | TPU |
|---|---|---|
| Flexibility | Very Low (Stiff) | Very High (Bendy) |
| Print Difficulty | Very Easy | Harder (Needs slow speed) |
| Main Job | Strong bases, frames | Soft grips, hinges, seals |
| Heat Resistance | Low | Medium |
By putting them together, you get the best of both worlds. You can design a solid box with a soft, built-in lid seal. You do not need to print two parts and assemble them later. This saves you a lot of time and makes your prototypes much better.
How Do You Set Up Your 3D Printer for Both PLA and TPU?
Setting up a printer for two materials can be scary. If your settings are wrong, your printer will jam, and your print will fail. Getting the right temperatures and speeds will save your print.
To print PLA and TPU together, you need a multi-extrusion printer or a tool-changing system. Set your PLA to print fast at around 200°C. Set your TPU to print very slowly at around 220°C. Turn off retraction for the TPU to stop the soft string from jamming in the gears.
Getting the Hardware Ready
You cannot just use any basic printer. You need a machine that can handle two materials at once. I use an IDEX (Independent Dual Extruder) printer at CavityMold for this. This means the printer has two separate print heads. One head holds the hard PLA, and the other holds the soft TPU. This stops the colors and materials from mixing inside a single nozzle and making a mess.
Tuning the Print Speeds
Speed is the biggest secret here. PLA loves to go fast. You can speed through the rigid parts of your model. TPU hates speed. If you push TPU too fast, it acts like a wet noodle. It will bend inside the extruder and cause a nasty jam. I always tell my team to slow the TPU speed down to 20 millimeters per second. It feels slow, but it works every time.
Printer Settings Checklist
Here is a simple table to show the basic settings I use.
| Setting | PLA | TPU |
|---|---|---|
| Nozzle Temp | 200°C – 210°C | 215°C – 230°C |
| Bed Temp | 60°C | 60°C |
| Print Speed | 60 mm/s or more | 15 – 25 mm/s |
| Retraction | Normal (On) | Very Low or Off |
Managing the Slicer Software
In your slicer software, you need to assign different parts of your model to different extruders. Make sure you use a prime tower. A prime tower is a little block the printer makes on the side of the bed. It cleans the nozzle before it moves back to your main model. This stops stringy plastic blobs from ruining your clean prototype.
What Are the Best Applications for PLA and TPU Multi-Material Parts?
Making prototypes that do not feel like the real thing wastes money. If your test parts do not work right, your final product might fail. Combining these materials lets you test real-world functions easily.
The best uses for PLA and TPU combined parts include custom tool handles with soft grips, electronics cases with waterproof seals, and moving parts with built-in flexible hinges. These prototypes feel and act like injection-molded products, letting you test how a part fits, bends, and feels in a user’s hand.
Designing Better Tool Handles
One of the best ways to use this trick is for handles. Think about a custom screwdriver or a bike grip. You want the core to be strong so it does not bend when you push it. That is the PLA. But you want the outside to feel soft and easy to hold. That is the TPU. I once printed a custom handle for a machine switch at our CavityMold shop. The soft grip made it much nicer for the workers to use all day long.
Creating Cases and Seals
Another great use is for electronic boxes. If you are making a remote control or a sensor case, you need to keep dust and water out. You can print the hard shell from PLA. At the same time, you print a soft TPU ring right into the edge of the lid. When you close the box, the TPU acts like a perfect rubber seal.
Ideas for Multi-Material Parts
Here is a table showing common ideas and how the materials work together.
| Application | PLA Role (Hard) | TPU Role (Soft) |
|---|---|---|
| Living Hinges | The two solid sides of a box | The bendy joint between them |
| Tires and Wheels | The solid plastic wheel hub | The soft rubber tire tread |
| Wearable Tech | The hard mount for the screen | The soft strap for your wrist |
Prototyping for Injection Molding
This is very important for project managers. Before you spend thousands of dollars on a real steel mold, you need to know if the design works perfectly. Printing the hard and soft parts together gives you a perfect test model. You can feel it, test the buttons, and check the seals before you ever cut any metal.
How Do You Solve Common Problems When Printing PLA and TPU Together?
Ruining a long print at the very end is frustrating. Oozing plastic and weak bonds can destroy your work. Learning to fix these common issues will keep your stress levels very low.
To fix poor sticking between PLA and TPU, increase the printing temperature slightly where the two materials meet. To stop stringing and messy blobs, use a wipe shield or prime tower in your slicer settings. Always dry your TPU before printing, as wet TPU boils and causes ugly, weak prints.
Fixing Weak Bonds
Sometimes, the soft part just peels off the hard part. This is the worst feeling. It usually means the plastics were not hot enough to melt together. To fix this, you can overlap the 3D models in your software by just 0.1 millimeters. This forces the printer to push the soft TPU slightly into the hard PLA layer. You can also raise the TPU nozzle temperature by 5 degrees. This makes the plastic more liquid, helping it grab the PLA surface much better.
Dealing with Wet TPU
TPU loves to soak up water from the air. If your TPU is wet, it will pop and hiss when it comes out of the hot nozzle. This leaves ugly holes in your print. I always keep my TPU in a dry box. If it gets wet, I put it in a food dehydrator for a few hours. Dry TPU prints smoothly and looks very shiny.
Solving Oozing and Stringing
Because TPU is runny, it likes to leak out of the nozzle while the PLA is printing. This leaves a web of soft strings all over your hard plastic part.
| Problem | Cause | Quick Fix |
|---|---|---|
| Weak sticking | Temps too low | Increase overlap and heat |
| Popping sounds | Wet TPU filament | Dry the filament in a dryer |
| Stringing | Nozzle leaking | Use an oozing shield in slicer |
The Power of the Ooze Shield
In your slicer program, turn on the "ooze shield" or "draft shield" setting. This builds a thin, trash wall around your real part. Any leaking plastic gets wiped off on the wall before the nozzle touches your real model. When the print is done, you just peel the shield away. It leaves your functional prototype looking clean and ready to use.
Conclusion
Combining PLA and TPU in 3D printing changes how we make prototypes. You get the strength of hard plastic and the flex of soft rubber in one single piece. By using the right settings, you can create amazing test models that save you time and money.