Struggling with flawed mold surfaces after hours of polishing? It’s frustrating. You want a perfect finish, but defects keep appearing, costing time and money.
The key is understanding defect causes. Orange peel often comes from heat or pressure issues, pitting from material problems or contamination, and over-polishing from excessive material removal. Identifying these helps you fix and prevent them effectively.
Getting that mirror finish on an injection mold is a real art, isn’t it? I’ve been in this game for a while now with CavityMold, and I’ve seen my fair share of polishing jobs. Some go smooth as silk, and others… well, they make you want to pull your hair out. You put in all that effort, expecting perfection, and then you spot those tell-tale signs of trouble. It’s a common headache for folks like Alex, our project manager friend, who need top-notch molds for their components. But don’t worry, we can usually track down the culprit. Let’s dive into some of these common polishing headaches and figure out how to sort them out, so you can get back to Master Molding Right.
What’s Actually Causing That Frustrating Orange Peel on My Molds?
Seeing that bumpy, orange-peel texture after polishing? It’s a classic sign something’s off. You’re aiming for smooth, but get this instead. It’s a real setback.
Orange peel is often due to an uneven surface structure. Common causes include excessive heat during grinding, too much polishing pressure, or an overly long polishing time. Sometimes, it’s the steel itself or improper heat treatment.
I remember this one project for a client in Germany; the surface finish was critical. And bam! Orange peel. It drove us nuts for a bit. We found out the steel wasn’t quite up to snuff for the high gloss we needed. But most of the time, as my insights suggest, it’s something in the process. You see, the mold surface can get too hot, or maybe there was a bit too much carbon introduced during an earlier heat treatment process – this is called excessive carburization. Then, when you start polishing, if you press too hard or polish for too long, you’re basically smearing the surface metal around instead of smoothly abrading it. Think of it like trying to spread cold butter – it just clumps and drags. This creates that characteristic uneven, dimpled surface. It’s not just ugly; it can affect part release and the final product’s look. So, we really need to nail down why it’s happening.
Here’s a bit more detail on what might be going on:
Deeper Dive into Orange Peel Causes
| Potential Cause | Why it Happens | What I Suggest Checking |
|---|---|---|
| Excessive Heat (Pre-polishing) | Grinding or EDM can overheat the surface, altering its structure and making it prone to orange peel. | Were grinding parameters too aggressive? Was the EDM flushing adequate? I’d check the machine settings first. |
| Over-polishing / Excessive Pressure | Too much force or time with fine abrasives can ‘smear’ the metal. It’s like you’re pushing the metal around. | Are your technicians using a light touch, especially in final stages? Are they sticking to recommended polishing times? |
| Steel Quality/Microstructure | Inclusions, large grain size, or inconsistent hardness in the steel can lead to uneven material removal. | Did you use the right grade of steel for the desired finish? Was the heat treatment done correctly? I always double check this. |
| Improper Heat Treatment | Issues like excessive carburization or decarburization can create a problematic surface layer. | Review the heat treatment certificates. Perhaps a small sample test could reveal surface carbon issues. |
| Abrasive Choice / Technique | Using abrasives that are too coarse for too long, or skipping grit stages. | Are you following a progressive grit sequence? Sometimes rushing this part is the real problem. |
I always tell my team, "Go easy, especially towards the end!" It’s a bit like sanding wood; you can’t just jump from super rough sandpaper to the finest grade and expect magic. It’s a process. And with molds, getting it wrong means starting over, which nobody wants.
How Can I Finally Get Rid of Annoying Pitting After Polishing?
You’re polishing away, and then you see them: tiny pits or pinholes. It’s like the mold surface has acne! This can be a real nightmare for part quality.
Pitting often results from non-metallic inclusions in the steel being dislodged during polishing, or from corrosion. Sometimes, overly aggressive abrasives or contamination in polishing compounds can also be the culprit.

Oh, pitting! That’s a sneaky one. I had this one mold, a fairly complex one for an automotive part, and these tiny pits kept showing up in one specific area. We tried everything – changing polishing pastes, different tools. Eventually, we traced it back to some microscopic impurities in that particular batch of P20 steel. It doesn’t happen often with good quality material, but it can happen. More commonly, though, it’s something else. For instance, if the steel wasn’t super clean to begin with – meaning it has tiny bits of non-metallic stuff in it, like oxides or sulfides – these can get plucked out during polishing, leaving a little hole. It’s like finding a pebble in clay; you pull it out, and there’s a void. Aggressive polishing, especially with coarse abrasives, can also sometimes "dig out" weaker spots in the material. And don’t forget simple contamination! If tiny, hard particles get into your polishing slurry or onto your cloth, they can act like mini-chisels, creating pits. It’s why a super clean environment is key for high-gloss polishing. Seriously, dust is the enemy here.
Let’s break down how to tackle these little devils:
Deeper Dive into Pitting: Causes and Fixes
| Potential Cause | Detailed Explanation | My Recommended Actions |
|---|---|---|
| Material Inclusions | Steel naturally contains some non-metallic inclusions. If they are near the surface, polishing can dislodge them, leaving a pit. This is more common in lower-grade steels. | Use high-quality, clean steel (e.g., vacuum-melted grades) for critical finishes. Sometimes, you can try to polish around a small pit if it’s not in a critical area, but it’s risky. |
| Corrosion | If the mold was stored improperly or exposed to moisture/corrosive substances before or during polishing, micro-corrosion can start, leading to pits. | Ensure proper mold storage with rust inhibitors. Use non-corrosive polishing compounds and clean thoroughly between stages. I always make sure things are dry. |
| Aggressive Polishing / Abrasives | Using abrasives that are too coarse or applying too much pressure can tear out small bits of the mold material, especially if the material has some inconsistencies. | Follow a gradual progression of abrasive grits. Use lighter pressure, especially with finer grits. Let the abrasive do the work, don’t force it. This is a classic rookie mistake I see. |
| Contamination in Polishing Medium | Hard particles (e.g., grit from a previous stage, environmental dust) in the polishing paste, slurry, or on the polishing cloth can cause scratching and pitting. | Maintain a meticulously clean polishing environment. Use separate, clean cloths for each grit. Filter polishing fluids if possible. Seriously, clean, clean, clean – I can’t stress this enough. |
| Release of Trapped Gases/Porosity | Less common, but if the steel has internal porosity near the surface, polishing can open these up. | This points back to steel quality. If this is a recurring issue with a steel type, consider ultrasonic testing or switching to a denser material. |
One time, we had a persistent pitting issue, and it turned out someone was using the same cloth for two different polishing paste grades – a big no-no! It was cross-contaminating and basically scratching the surface we were trying to perfect. Little things, right? They make a huge difference.
Am I Ruining My Molds by Over-Polishing Them, and How Do I Stop?
You want that perfect shine, so you keep polishing… and polishing. But then, edges lose their sharpness, or details look washed out. Are you doing more harm than good?
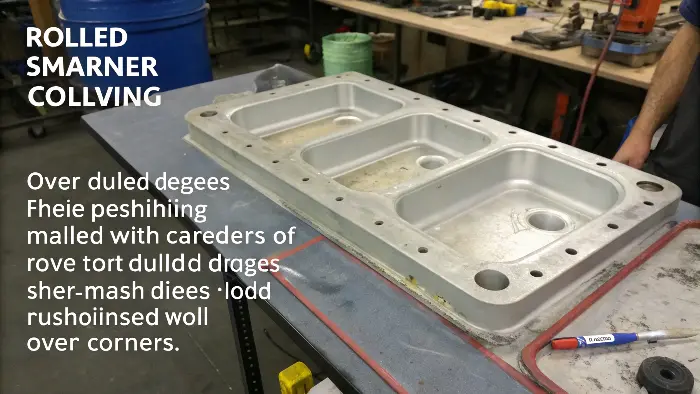
Yes, over-polishing is a real risk. It happens when too much material is removed, leading to dulled edges, distorted features, and a "rolled-over" look on corners. Knowing when to stop is crucial.

This is a tricky one because the line between "perfectly polished" and "oops, I went too far" can be super fine. I’ve seen it happen – especially with enthusiastic newer technicians. They’re aiming for that flawless mirror, but they don’t realize that every pass with the polishing tool removes a tiny bit of material. Keep going, and those sharp, crisp edges that are so important for part definition can start to round off. Complex details can lose their definition. It’s like sanding a wooden carving too much; you lose all the sharp lines. For Alex, managing a project where part tolerances are tight, this could mean a mold that produces out-of-spec parts. That’s a costly mistake. The thing is, you can’t really add material back easily once it’s gone (well, you can, with laser welding, but that’s a whole other repair job you want to avoid). So, the key is to recognize the signs and know when "good enough" is actually "perfect." It’s more about finesse than brute force.
Let’s explore this further so you don’t fall into the over-polishing trap:
Deeper Dive into Over-Polishing: Signs and Prevention
| Aspect of Over-Polishing | What to Look For / Understand | My Prevention Tips |
|---|---|---|
| Loss of Edge Sharpness | Corners and edges that should be crisp and well-defined become rounded or "soft." This is often the first and most obvious sign. | Protect sharp edges with masking tape during general polishing if possible. Use smaller, more precise polishing tools near edges. Focus on the surfaces, not aggressively working the edges. I always tell my guys, "Respect the edges!" |
| Distortion of Fine Details | Small ribs, bosses, lettering, or intricate textures can lose their definition and appear blurred or washed out. | Use very fine abrasives and minimal pressure in detailed areas. Sometimes, hand polishing with specialized tools is better than power tools for intricate spots. Consider if the detail really needs that Nth degree of shine. |
| Uneven Surface/Dish Out | Softer areas of the mold or areas polished more aggressively can become slightly concave or "dished out" compared to surrounding, harder areas. This can be subtle but affect part flatness. | Maintain consistent pressure and movement across the entire surface. Be aware of variations in material hardness if you’re working with repaired or welded molds. Regular dimensional checks can help catch this. |
| Extended Polishing Times | If you find yourself polishing for an excessively long time with very fine abrasives without seeing much improvement, you might just be removing material unnecessarily. | Trust the process of progressive grit removal. Once you’ve achieved the desired smoothness with a particular grit, move on. Chasing an "extra 1%" of shine can sometimes lead to over-polishing. |
| The "Rolled Edge" Phenomenon | This is common on parting lines. Excessive polishing can actually roll the metal slightly over the edge, creating a tiny burr or a condition that makes flash more likely. | Be extremely careful around parting lines. Polish up to the edge, not over it aggressively. Use directional polishing away from the edge if feasible. |
I always emphasize regular inspection under good lighting and magnification during the final polishing stages. It’s better to stop a little early and assess than to push it too far. We often use a profilometer or even just skilled visual checks against a master sample. Knowing when to call it "done" is a real skill, one that comes with experience. It’s not just about making it shiny; it’s about preserving the mold’s geometry.
