
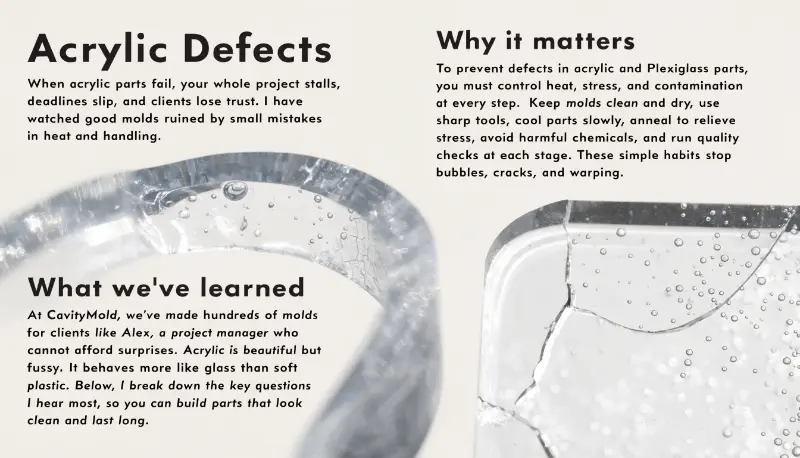
Cracks. Bubbles. Cloudy edges. When acrylic parts fail, your whole project stalls, deadlines slip, and clients lose trust. I have watched good molds ruined by small mistakes in heat and handling. The good news? Most acrylic defects are easy to stop once you know the rules.
To prevent defects in acrylic and Plexiglass parts, you must control heat, stress, and contamination at every step. Keep molds clean and dry, use sharp tools, cool parts slowly1, anneal to relieve stress2, avoid harmful chemicals, and run quality checks at each stage. These simple habits stop bubbles, cracks, and warping.
I have spent years at CavityMold making molds for clients like Alex, a project manager who cannot afford surprises. Acrylic is beautiful but fussy. It behaves more like glass than soft plastic. Below, I break down the key questions I hear most, so you can build parts that look clean and last long.
How to prevent defects in manufacturing?
A late defect can cost you a whole batch. I have seen a full production run scrapped because one setting was off. The pain is real, and the fix starts before the machine even turns on.
Prevent defects by controlling temperature, stress, and cleanliness at every stage. Keep molds clean and dry, hold proper melt and forming temperatures, cool parts slowly, and inspect at multiple points. Train your operators well and set clear tolerances. Small, steady controls stop most bubbles, cracks, and warping.
Control heat and stress
Acrylic reacts fast to heat. Too much heat brings bubbles and yellowing. Uneven cooling leaves hidden stress that later cracks. I always keep molds and melt within the right range. Then I cool parts slowly and anneal them when the job is demanding. This step relieves internal stress that would otherwise show up as crazing weeks later.
Keep things clean and dry
Dust and moisture are silent enemies. A clean, dry mold stops surface pits and cloudy spots. I store sheets flat, keep the masking on, and handle parts with gloves.
Check early and often
I never wait until the end to inspect. Staged checks catch small problems before they grow.
| Stage | What to Check | Why It Matters |
|---|---|---|
| Incoming material | Grade, thickness, damage | Bad stock ruins good work |
| In-process | Heat, pressure, cooling | Catches drift early |
| Final | Surface, dimensions | Confirms it is shippable |
These habits together keep my defect rate low and my clients happy.
How to protect plexiglass?
One scratch can turn a perfect part into scrap. Plexiglass looks tough but scratches and reacts to chemicals fast. I have lost sheets simply because someone set a dirty tool on top of them.
Protect Plexiglass by keeping the protective masking on until the last moment, storing sheets flat in a clean and dry place, and handling with gloves. Avoid contact with harmful chemicals like solvents and cleaners. Use soft supports, never drag parts, and cover surfaces during storage and transport.
Keep the masking on
The film that comes on the sheet is your best friend. I leave it on through cutting and machining, and only peel it in the cut path. This stops scratches and traps less dust on the surface.
Watch your chemicals
Acrylic hates the wrong chemicals. Some cleaners, solvents, and adhesives cause cloudy patches or slow degradation. I only use approved products. Before bonding, I test on a scrap piece first.
Store and handle with care
I store sheets flat, not leaning against walls where they warp. I use gloves so oils from hands do not mark the surface. Between stacked parts, I add soft interlayers.
| Threat | Simple Protection |
|---|---|
| Scratches | Keep masking, use soft supports |
| Chemical attack | Use only approved cleaners |
| Warping | Store flat, avoid heat |
| Dust pits | Clean, covered storage |
Protection is cheap. Replacing damaged sheets is not.
What are the rib design guidelines for plastic parts?
Ribs add strength, but bad ribs create sink marks and warping. I have seen thick ribs pull the surface inward and ruin a clean face. Good rib design saves both strength and looks.
For plastic parts, keep rib thickness at about 40–60% of the wall thickness to avoid sink marks. Make ribs no taller than three times the wall thickness. Add a small draft angle of 0.5–1.5 degrees for easy release, and round the base with a fillet to reduce stress and improve flow.
Keep ribs thin
The biggest rule is simple. A thick rib pulls material and leaves a sink mark on the opposite face. I keep rib thickness under two-thirds of the wall. This keeps the surface smooth.
Control height and draft
Tall ribs are weak and hard to fill. I limit rib height to about three times the wall thickness. I also add a draft angle so the part slides out of the mold without dragging.
Use fillets at the base
A sharp corner at the rib base concentrates stress and blocks flow. A small fillet fixes both. But too big a fillet adds mass and brings sink marks back.
| Feature | Recommended Value |
|---|---|
| Rib thickness | 40–60% of wall |
| Rib height | Up to 3× wall |
| Draft angle | 0.5–1.5 degrees |
| Base fillet | 0.25–0.5× wall |
For acrylic, I stay careful because the material is brittle. Good ribs mean strong parts with no ugly marks.
What are the hazards in plastic manufacturing industry?
Making plastic parts is not risk-free. I have seen burns, fumes, and cuts on the shop floor. Ignoring safety hurts people and slows production. Knowing the hazards keeps your team safe and your output steady.
Hazards in plastic manufacturing include burns from hot melt and molds, harmful fumes from heated plastics and solvents, cuts from sharp tools, and dust from machining. Machine pinch points, high pressure, and chemical exposure add more risk. Proper ventilation, guards, training, and protective gear reduce these dangers greatly.
Heat and fumes
Molten acrylic is very hot and can burn skin fast. When acrylic heats up, it can release fumes. I always run good ventilation and keep operators away from the hot zone. During laser cutting, I remove or use safe masking so it does not release nasty residue.
Machines and sharp tools
Injection machines use high pressure and strong clamping force. A hand in the wrong spot is dangerous. I use guards and clear lockout rules. Machining leaves sharp edges and fine dust, so I use gloves, glasses, and dust collection.
Chemical handling
Solvents for bonding can harm skin and lungs. I store them safely and use them with airflow.
| Hazard | Main Risk | Control |
|---|---|---|
| Hot melt | Burns | Guards, PPE |
| Fumes | Breathing harm | Ventilation |
| Sharp tools | Cuts | Gloves, care |
| Machines | Crush injury | Lockout, guards |
Safety is not extra work. It is part of good work. A safe shop makes better parts.
Conclusion
Acrylic and Plexiglass reward care and punish shortcuts. Control heat, stress, and cleanliness. Protect surfaces, design ribs right, and keep your team safe. At CavityMold, these simple habits help us deliver clean, strong parts on time. Master these guidelines, and defects drop fast.
"Mechanical Performance of Structural Polymethyl Methacrylate …", https://pmc.ncbi.nlm.nih.gov/articles/PMC11644331/. Rapid cooling of thermoplastic materials creates temperature gradients between surface and core regions, causing differential contraction that generates internal stress and can lead to warping, crazing, or cracking in the finished part. Evidence role: mechanism; source type: research. Supports: Rapid cooling creates thermal gradients and internal stress in thermoplastics. ↩
"Mechanical Performance of Structural Polymethyl … – PMC", https://pmc.ncbi.nlm.nih.gov/articles/PMC11644331/. Thermal annealing allows polymer chains in acrylic (PMMA) to relax and redistribute internal stresses that develop during processing, typically performed at temperatures between 70-90°C for several hours depending on part thickness. Evidence role: mechanism; source type: research. Supports: Annealing reduces internal stress in acrylic polymers through controlled heating. Scope note: Optimal annealing parameters vary with part geometry and processing history ↩