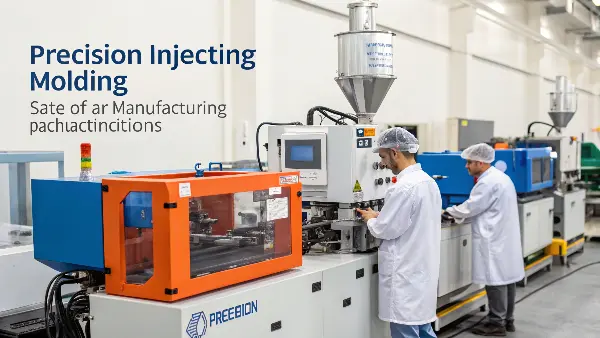
Struggling to find a reliable partner for your high-precision projects? The stress of inconsistent quality, missed deadlines, and poor communication can derail your entire production schedule. At CavityMOLD, we combine state-of-the-art equipment and decades of expertise to deliver the flawless results you demand.
We master precision injection molding through a powerful combination of advanced equipment, deep expertise, and rigorous processes. Our high-speed CNC machines and EDMs create tooling with micron-level accuracy. Our engineering team, with over 20 years of experience, oversees every detail. From material selection to final inspection, we ensure every mold meets your exact specifications, a commitment proven by our success stories across multiple industries.

You’ve now seen the big picture of how we operate. But I know that for a project manager like you, the details are what truly matter. What does "precision injection molding" really mean for your specific components? How do we handle crucial choices about mold materials, and what does the process actually look like from start to finish? And of course, the big question: what are the costs involved?
Let’s dive deeper into these questions. I want to give you a clear, no-nonsense breakdown of how we turn your complex designs into perfectly manufactured parts, every single time.
What Is Precision Injection Molding, and Why Does It Matter for Your Project?
Do your plastic parts require extremely tight tolerances? Are you tired of components that don’t fit together perfectly, leading to assembly headaches and product failures? These small inaccuracies can cause big problems, wasting time and money. For your most critical projects, the margin for error is zero.
Precision injection molding is an advanced process used to produce plastic parts with incredibly tight tolerances, often measured in microns. It demands absolute control over the molding machine, exceptionally high-quality molds, and consistent process parameters. This is critical for complex parts in the medical, electronics, and automotive sectors, where perfect accuracy and repeatability are non-negotiable for product performance and safety.

When I talk to new clients, one of the first things we discuss is whether their project truly requires precision molding or if standard molding will suffice. The difference is significant, not just in the final part, but in the entire approach to manufacturing the tool.
Standard vs. Precision Molding: Key Differences
The core differences come down to tolerance, tooling, process control, and, consequently, cost. Standard molding is perfect for many consumer products, but when performance hinges on fractions of a millimeter, precision is the only way forward.
| Feature | Standard Injection Molding | Precision Injection Molding |
|---|---|---|
| Tolerance | Typically ±0.1mm or greater | As tight as ±0.01mm or less |
| Tooling | Good quality steel (e.g., P20) | High-grade, hardened steel (e.g., H13, S136) |
| Process Control | Standard monitoring | Intensive, real-time sensor monitoring |
| Cost | Lower upfront tooling cost | Higher investment in tooling & process |
When Do You Need Precision Molding?
A few years ago, a project manager from a top electronics company came to us. His team was developing a new handheld device with intricate internal components that had to snap together flawlessly. Their previous supplier produced parts that were just slightly out of spec, causing assembly line delays and functionality issues. This is a classic case where precision molding is essential. We took on the project, using our high-speed CNC centers to build a mold with tolerances they hadn’t been able to achieve before. The result was perfect part-to-part consistency, which solved their assembly bottleneck. You need this level of precision for micro-gears, medical device connectors, optical lenses, and any component where failure is not an option.
What Are the 5 Key Steps in the Injection Molding Process?
Does the injection molding process sometimes feel like a black box? Are you ever unsure about what exactly happens between approving a design and holding a finished part in your hand? This lack of clarity can make it difficult to troubleshoot potential issues or optimize your design for manufacturability.
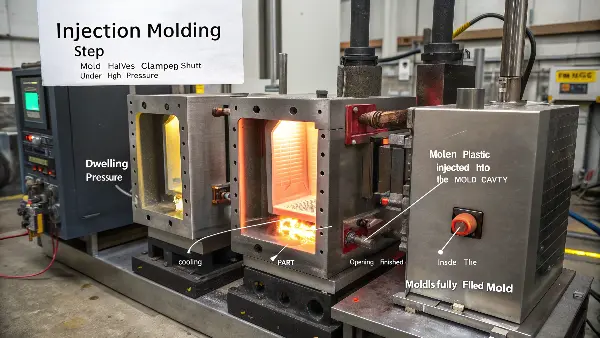
The five essential steps of injection molding are: Clamping, Injection, Dwelling (or Packing), Cooling, and Ejection. First, the two halves of the mold are clamped shut under high pressure. Then, molten plastic is injected into the mold cavity. The dwelling phase applies pressure to ensure the mold is completely filled. Next, the part cools and solidifies. Finally, the mold opens and the finished part is pushed out.

Understanding this cycle is fundamental to understanding how we ensure quality. At CavityMOLD, we don’t just run a machine; we meticulously control every parameter at each stage. Let me walk you through how we manage this process to guarantee a perfect outcome for your parts.
A Closer Look at Each Stage
Each of these five steps has critical variables that we fine-tune for every unique project. It’s a science, and our engineers are masters of it.
- Clamping: Before anything else, the two halves of your mold have to be closed and held together with immense force. The clamping force must be strong enough to resist the pressure of the molten plastic being injected. We calculate the required tonnage carefully to prevent the mold from flashing (where plastic seeps out of the seams), which would create defects.
- Injection: This is where the magic happens. Plastic pellets are melted and then injected into the mold cavity at high speed and pressure. We control the injection speed, pressure, and shot size with extreme precision. Too slow, and the part might not fill completely; too fast, and it can cause cosmetic defects.
- Dwelling (Packing): After the main cavity is filled, we apply sustained pressure. This "packing" phase forces more material into the mold to compensate for shrinkage as the plastic begins to cool. This step is vital for ensuring the part is dense, free of sink marks, and dimensionally accurate.
- Cooling: This is often the longest part of the cycle. The mold has internal cooling channels through which water circulates to bring the part’s temperature down until it’s solid enough to be ejected. The cooling time is a delicate balance; it must be long enough for the part to be stable, but not so long that it becomes inefficient.
- Ejection: Once the part is cool, the mold opens, and an ejector system—usually pins or a plate—pushes the finished part out of the cavity.
Our Role in Optimizing the Process
Our work starts long before the machine is turned on. We use advanced Moldflow analysis software to simulate the entire injection process. This lets us predict and solve problems like air traps, weld lines, or warping before we even cut the first piece of steel. This proactive approach saves our clients time and money. It’s how we ensure the process is not a black box, but a transparent, predictable manufacturing solution.
What Materials Are Best for Your Mold Cavity and Core?
Are you feeling confused about which type of steel is right for your injection mold? Choosing the wrong material can lead to premature tool wear, a poor surface finish on your parts, or unexpected maintenance costs down the road. This single decision can impact your entire project budget and timeline.
Mold cavities and cores are typically made from various grades of tool steel. For prototypes and lower-volume production, pre-hardened steels like P20 are a cost-effective choice. For high-volume projects or when using abrasive plastics, fully hardened steels like H13 or stainless S136 are necessary. These offer superior wear resistance and can be polished to a mirror finish, ensuring long-term part quality and mold durability.

The material we use to build your mold is just as important as the plastic resin you choose for your part. The mold is the heart of the production process, and its longevity and performance depend entirely on making the right material choice from the very beginning.
Common Mold Steels and Their Applications
Think of mold steels like different tools in a toolbox—each is designed for a specific job. An aluminum mold might be great for a few hundred prototype parts, but it would never survive a million-cycle production run with glass-filled nylon. We guide our clients through these choices every day.
| Material | Hardness (HRC) | Best For | Polishability | Relative Cost |
|---|---|---|---|---|
| P20 | ~30-36 HRC | Prototyping, Low-to-medium volume | Good | Low |
| H13 | ~48-52 HRC | High-volume, Abrasive materials (e.g., GF Nylon) | Very Good | Medium |
| S136 | ~48-52 HRC | High-volume, Corrosive plastics (e.g., PVC), Medical | Excellent (Mirror) | High |
| 7075 Aluminum | N/A | Rapid prototyping, Very low volume | Fair | Very Low |
How We Help You Choose
When a client comes to me with a new project, we don’t just ask for the 3D file. I ask about four key things to recommend the right mold steel:
- What is the plastic resin? A simple polypropylene part is easy on a mold. A 30% glass-filled polycarbonate part is highly abrasive and will wear down a softer steel quickly.
- What is the required part finish? If you need a textured surface, P20 is often fine. If you need a crystal-clear, optical-grade part, you need a high-purity stainless steel like S136 that can be polished to a mirror finish.
- What is the expected production volume? For a 5,000-part run, P20 is a smart, economical choice. For a 500,000-part run, investing in H13 is essential for ensuring the mold lasts the entire production life without failing.
- What is your budget? We always aim to find the sweet spot between upfront cost and long-term value. Sometimes, spending a bit more on better steel today saves thousands in repairs and downtime later. It’s my job to make that long-term value clear.
How Much Does a Custom Injection Mold Actually Cost?
Is getting a clear, upfront cost for an injection mold one of your biggest challenges? Do vague quotes with the potential for hidden fees make it nearly impossible to get your project budget approved? This uncertainty can stop a great project in its tracks.
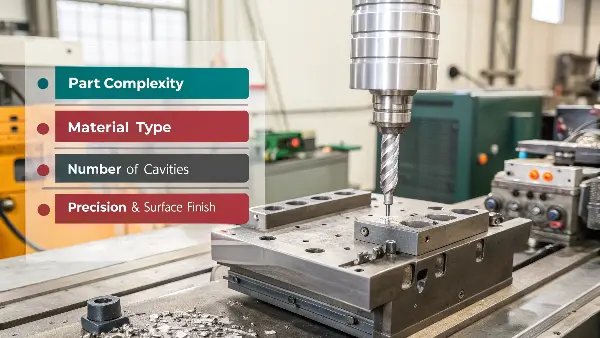
A custom injection mold can cost anywhere from a few thousand dollars to over $100,000. The final price is driven by part complexity (features like undercuts or threads), the mold material (P20 vs. hardened H13 steel), the number of cavities in the mold, and the required precision and surface finish. Simple, low-volume molds are cheaper, while complex, high-volume molds are a significant investment that delivers a much lower cost per part.

"How much will it cost?" is always one of the first questions, and the honest answer is always "it depends." But that isn’t a helpful answer without context. So, instead of being vague, I prefer to walk my clients through the exact factors that build the final price. My goal is to give you a quote with no surprises.
Key Factors Influencing Mold Cost
Let’s unpack the major elements that determine the investment needed for your tool. Understanding these helps you see exactly where your money is going.
- Part Design & Complexity: This is the biggest cost driver. A simple, open-and-shut part is straightforward. But once you add features like undercuts, threads, or tight tolerances, the mold requires complex mechanisms like side-actions, lifters, or unscrewing cores. Each complex feature adds machining time, assembly work, and cost.
- Mold Material: As we just discussed, the steel choice matters. A mold made from pre-hardened P20 steel will be significantly less expensive than one made from fully hardened H13 or stainless S136 steel, which are harder to machine and require heat treatment.
- Number of Cavities: A single-cavity mold produces one part per cycle. A multi-cavity mold (e.g., 4, 8, or 16 cavities) produces multiple parts per cycle. The multi-cavity mold is much more expensive to build, but it dramatically lowers your price per part, making it ideal for high-volume production.
- Surface Finish: A standard textured finish (like a matte SPI-B2) is relatively simple to apply. A high-gloss, mirror-polish finish (SPI-A1) requires many hours of skilled manual labor and a high-grade steel, which increases the cost substantially.
- Mold Base Size: Simply put, larger parts require larger blocks of steel and a larger mold base to hold them, which naturally increases material and machining costs.
Getting an Accurate Quote from Us
To give you a precise and reliable quote, we need a few things from you: a 3D CAD file of your part, the specified plastic resin, your estimated annual or total production quantity, and the desired surface finish. Armed with this information, we can provide a fully detailed quote that breaks down the costs Transparently. I always tell project managers like you: the more information you give me, the more accurate and dependable my quote will be.
Conclusion
We’ve covered the core of what we do: from defining precision molding and its 5-step process to selecting the right materials and understanding costs. We believe that by mastering these fundamentals, we provide more than just a mold; we provide a reliable, high-performance manufacturing solution for your business.
