Are you struggling with inconsistent part quality in your injection molding projects? One batch has flash around the edges, while the next has ugly sink marks, forcing you to scrap parts and waste money. This frustrating cycle often points to one critical, misunderstood setting. Mastering the switchover position is the key to leaving these defects behind and achieving a stable, repeatable process.
The switchover position, also known as the V/P (Velocity to Pressure) switchover, is the exact point in the injection cycle where the machine stops filling the mold by speed and starts packing it by pressure. This transition typically happens when the mold cavity is 95-98% full. Getting this single setting right is the most important factor in preventing defects like flash and sink marks.

This transition from filling to packing is the heart of a successful molding process. It’s a delicate handover that determines the final quality and dimensional accuracy of your part. But to truly grasp why this moment is so critical, we first need to understand the more basic concept of "position" and how the machine uses it to control the entire injection stroke.
What is position in injection molding?
Have you ever tried to troubleshoot a molding issue and been confused by terms like "screw position" or "shot size"? Without a solid understanding of what "position" physically represents, you can’t effectively diagnose problems or communicate requirements to your manufacturing partner. Let’s clear up this fundamental concept so you can take control of your projects.
In injection molding, "position" refers to the linear location of the injection screw inside the machine’s barrel. It’s a precise measurement, usually in millimeters or inches, that tells us exactly how much molten plastic has been prepared for the shot and how much has been pushed into the mold at any given moment. It is the primary control for the volume of material.

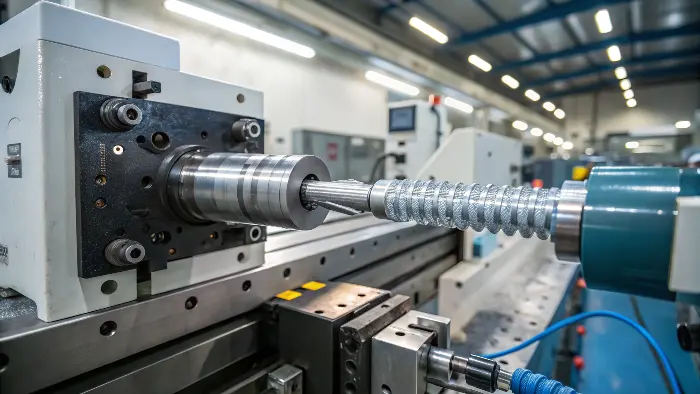
Think of the injection screw as a plunger in a syringe. Its job is twofold. First, it rotates to melt plastic pellets and carry them to the front of the barrel. As it does this, it moves backward to a specific starting point. This starting point defines the "shot size," or the total volume of plastic ready for injection. Then, during injection, the screw stops rotating and moves forward, pushing the molten plastic into the mold just like a plunger. The distance it travels forward is its "position."
I always tell new engineers to focus on position first. It’s the most direct and repeatable measurement we have. Relying on time or pressure alone can be misleading because material viscosity can change, but the physical volume of the mold cavity never does.
The Role of Screw Position in the Molding Cycle
The screw’s position is tracked constantly throughout the four main stages of the injection process. Understanding its movement is key to understanding the entire cycle.
| Molding Cycle Stage | Screw Action | Purpose of Position Control |
|---|---|---|
| 1. Dosing (Plasticizing) | Rotates and moves backward. | The screw retracts to a set starting position (e.g., 100mm). This sets the exact volume of plastic for the next part, known as the shot size. |
| 2. Injection (Filling) | Moves forward rapidly without rotating. | The screw travels from its starting position towards zero. Its speed is controlled, and its forward position tells us how full the mold is. |
| 3. Packing (Holding) | Pushes forward with sustained pressure. | After reaching the switchover position (e.g., 5mm), the screw continues to push with a set pressure to pack out the part and compensate for shrinkage. |
| 4. Cooling & Reset | Remains forward or begins dosing again. | The screw holds its forward position until the part is solid, then prepares for the next cycle by starting the dosing stage again. |
By tracking the screw’s linear position, we have a precise, repeatable way to control the volume of plastic entering the mold. This foundation is what makes a stable and high-quality process possible.
What is the transition position in injection molding?
You’ve set your temperatures, speeds, and pressures, but your parts are still coming out with flaws. Some have material squeezing out the sides, while others look sunken and incomplete. This maddening inconsistency can make you feel like you’re just guessing. The root of the problem is almost certainly a poorly set transition position.
The transition position, or V/P switchover, is the specific screw position where the machine’s control strategy changes from filling by volume (at a set speed) to packing by pressure. This is the most critical setting in the entire process. It ensures the mold is filled quickly and then packed precisely to create a perfect, defect-free part.

The injection process is split into two phases for a very important reason. The first phase, filling, is all about speed. We want to inject about 95-98% of the plastic into the mold as fast as possible without degrading the material or causing cosmetic issues. This is best controlled by the screw’s velocity. The second phase, packing, is about pressure. Once the cavity is almost full, we switch to pressure control to gently add the last bit of material and compensate for plastic shrinkage as it cools.
I remember a project for a project manager named Alex. He was developing a complex housing for a consumer electronic device. His team was getting incredibly frustrated with parts that had both flash and sink marks, sometimes on the same piece! We analyzed his process and found the machine was switching over based on time, which was inconsistent. We changed the process to switch over at a precise screw position. The defects vanished instantly. It was a powerful reminder that this single setting is the key to stability.
Why the Switchover Point is So Critical
Setting the transition position correctly is a balancing act. Too early, and the part won’t be full. Too late, and you’ll flash the mold.
| Switchover Position | Resulting Problem | Why It Happens |
|---|---|---|
| Too Early | – Short Shots – Sink Marks – Poor Surface Detail |
The machine switches to the lower packing pressure before the cavity is full. There isn’t enough material or force to fill the last details and compensate for shrinkage. |
| Too Late | – Flash – Overpacking / High Stress – Part Ejection Issues – Potential Mold Damage |
The high-speed injection phase continues after the mold is full. The immense pressure forces plastic out of the parting line (flash) and compresses the material inside, leading to stress and sticking. |
The best way to set the switchover position is through a systematic test. You start by setting the packing pressure to zero and injecting a "short shot" that is only about 50% full. You gradually increase the shot size until the part is about 95-98% visually full, without any packing pressure. The screw position at that exact moment becomes your ideal switchover position. From there, you can dial in the packing pressure and time to perfect the part’s final details and dimensions. This methodical approach takes the guesswork out of the equation and builds a robust, repeatable process.
Conclusion
Ultimately, the switchover position is the critical handshake between the filling and packing stages of injection molding. It’s not just another setting; it’s the foundation of a stable and high-quality process. Understanding and precisely controlling this transition from velocity to pressure is essential for any engineer or project manager dedicated to achieving defect-free parts, every single time.
