Struggling to understand how those perfect plastic parts are made in huge numbers? Injection molding might seem like a complex industrial secret. But knowing its key points can really open your eyes to how quality and efficiency are achieved in plastic manufacturing.
Injection molding is a manufacturing process that injects molten plastic into a mold to create identical plastic parts. Key points include the process steps (clamping, injection, cooling, ejection), critical parameters like temperature, pressure, and injection speed, and the importance of mold design and material selection. Understanding these elements is crucial for achieving high-quality, consistent, and cost-effective plastic parts.

Now that you have a general idea, you might be curious about the details. Each element plays a vital role in the final product. Let’s break these down further. I believe that once you see how these pieces fit together, the whole process becomes much clearer and more manageable.
What are the basics of injection molding?
New to the world of plastic manufacturing? The term "injection molding" might sound very technical and a bit intimidating. But understanding its basics is the first step to seeing how countless everyday plastic items, from bottle caps to car parts, actually come to life.
Injection molding is a popular manufacturing method for mass-producing plastic parts with high precision. It works by melting plastic resin, typically in pellet form, and then injecting this molten material under high pressure into a custom-made mold cavity. The plastic then cools and solidifies, taking the shape of the mold, and the finished part is ejected.

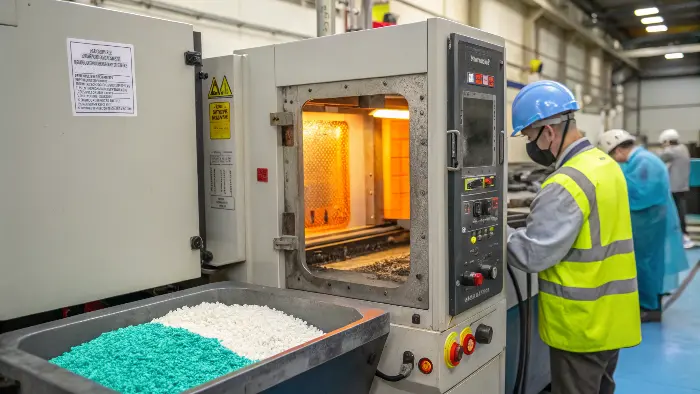
Let’s dive deeper into these basics. At its heart, injection molding is a transformative process. It takes raw plastic material, usually small pellets, and turns it into a finished, functional part. This happens inside an injection molding machine (IMM). This machine has two main parts: the injection unit and the clamping unit. The injection unit is responsible for melting the plastic and forcing it into the mold. The clamping unit holds the two halves of the mold tightly together during injection and cooling, and then opens them to release the part.
The mold itself is a critical component. It’s usually made from steel or aluminum and is precision-machined to create the cavity that forms the part’s shape. Molds can be simple, with just one cavity to make one part at a time, or complex, with multiple cavities to produce many parts simultaneously. The materials used are mostly thermoplastics, which can be melted and cooled multiple times. Think of materials like polypropylene, polyethylene, ABS, or polycarbonate. The applications are incredibly diverse. I remember the first time I stood next to a large injection molding machine in operation. The rhythmic sound, the speed at which parts were being produced, and the precision involved really fascinated me. It was then I realized the power and versatility of this process.
Here’s a quick look at the basic components:
| Component | Function |
|---|---|
| Injection Unit | Melts plastic pellets and injects the molten material. |
| Clamping Unit | Holds the mold closed during injection and opens it for ejection. |
| Mold (Tool) | Contains the cavity that shapes the molten plastic. |
| Plastic Resin | Raw thermoplastic material in pellet form. |
| Hopper | Feeds plastic pellets into the injection unit. |
Understanding these fundamental elements is the foundation for grasping the entire injection molding process.
What are the 5 steps of injection molding?
Ever wondered about the exact sequence that creates a plastic part, over and over again? The injection molding cycle isn’t just a single action; it’s a precise dance of several steps. Knowing these steps helps you understand the process flow and how to optimize production for speed and quality.
The injection molding process typically involves five key steps in a cycle: 1. Clamping (the two halves of the mold are securely closed), 2. Injection (molten plastic is forced into the mold cavity), 3. Dwelling/Holding (pressure is maintained to ensure complete filling and compensate for shrinkage), 4. Cooling (the plastic solidifies within the mold), and 5. Ejection (the mold opens and the finished part is removed).

Let’s look closer at each of these five steps. This cycle repeats continuously to produce parts.
- Clamping: Before any plastic is injected, the two halves of the mold must be securely closed by the clamping unit. This unit exerts a significant force to keep the mold shut against the pressure of the incoming molten plastic. If the clamp isn’t strong enough, plastic could leak out, creating "flash."
- Injection: Once the mold is clamped, the injection unit pushes molten plastic into the mold cavity. The plastic pellets are melted by heat and the mechanical action of a reciprocating screw. This screw then acts like a plunger, forcing the melt into the mold at a specific speed and pressure.
- Dwelling/Holding: After the main injection phase fills most of the mold, a holding pressure is applied. This "dwelling" or "holding" phase packs additional material into the cavity to compensate for plastic shrinkage as it cools. This step is crucial for achieving correct part dimensions and minimizing defects like sink marks.
- Cooling: The molten plastic inside the mold begins to cool as soon as it makes contact with the mold surfaces. The mold typically has cooling channels through which water or oil circulates to control the temperature and speed up solidification. Cooling time is often the longest part of the cycle and significantly impacts productivity.
- Ejection: After the part has cooled sufficiently and become solid, the clamping unit opens the mold. Ejector pins or other mechanisms then push the finished part out of the mold cavity. The machine then resets for the next cycle to begin.
I recall a project where we were getting inconsistent part weights. After checking everything, we found the holding time was set too short. The parts weren’t being packed properly. Adjusting that one step in the cycle made all the difference. Each step is vital.
Here’s a summary of the steps:
| Step | Purpose |
|---|---|
| 1. Clamping | Securely closes and holds the mold halves together. |
| 2. Injection | Fills the mold cavity with molten plastic material. |
| 3. Dwelling/Holding | Applies pressure to pack material and compensate for material shrinkage. |
| 4. Cooling | Allows the plastic part to solidify to the desired shape. |
| 5. Ejection | Opens the mold and removes the finished, solidified part. |
This five-step cycle is the backbone of injection molding.
What are the key parameters of injection molding?
Getting consistent, high-quality plastic parts isn’t just about having a machine and a mold; it’s about precise control. If your parts are showing defects like warping, burn marks, or incomplete filling, understanding and adjusting the key injection molding parameters is where you’ll find your solutions.
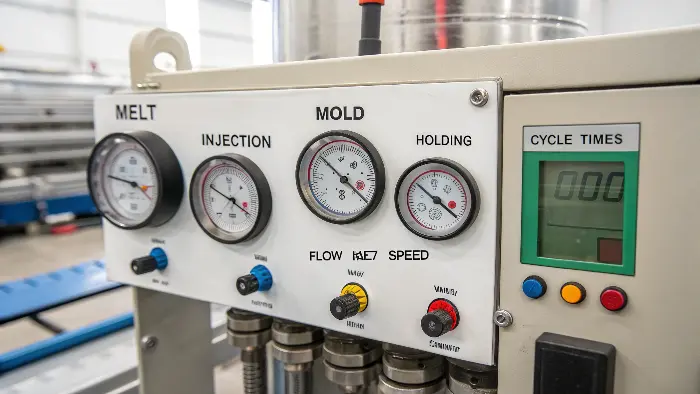
Key parameters in injection molding include melt temperature, mold temperature, injection pressure, injection speed, holding pressure, holding time, and cooling time. These must be carefully controlled and optimized for the specific plastic material being used and the part’s design to achieve the desired quality, consistency, and production efficiency.

Let’s dive deeper into these critical parameters. Each one has a direct impact on the final part.
Melt Temperature: This is the temperature of the plastic as it’s injected into the mold. If it’s too low, the plastic might be too viscous and won’t fill the mold properly. If it’s too high, the material can degrade, losing its properties or even burning.
Mold Temperature: The temperature of the mold surfaces affects how quickly the plastic cools. It influences the part’s surface finish, shrinkage, internal stresses, and even the cycle time. Different plastics require different mold temperatures.
Injection Pressure: This is the pressure used to push the molten plastic into the mold cavity. It needs to be high enough to fill the mold completely and quickly, but not so high that it causes flash or overstresses the mold.
Injection Speed: This is how fast the molten plastic is injected. The speed can affect how the mold fills, the presence of weld lines (where two flow fronts meet), and shear stress on the material.
Holding Pressure and Time: After the initial injection, holding pressure is applied for a certain time to pack more material into the cavity as the plastic shrinks during cooling. This helps prevent sink marks and voids and ensures dimensional accuracy.
Cooling Time: This is the duration the part stays in the mold to solidify enough for ejection. It’s often the largest portion of the overall cycle time. Too short, and the part might deform; too long, and productivity suffers.
I remember working on a thin-walled electronics enclosure. We struggled with short shots (incomplete parts) until we carefully balanced the melt temperature, injection speed, and injection pressure. A small adjustment to the mold temperature also helped the flow. It’s a delicate balance.
Here’s how these parameters influence the process:
| Parameter | Influence on Part Quality & Process |
|---|---|
| Melt Temperature | Affects material viscosity, flow, potential for degradation, fill. |
| Mold Temperature | Impacts surface finish, crystallinity, shrinkage, warpage, cycle time. |
| Injection Pressure | Ensures complete mold filling, part density, can cause flash if too high. |
| Injection Speed | Affects fill pattern, shear heating, weld lines, surface appearance. |
| Holding Pressure & Time | Manages part packing, sink marks, voids, dimensional stability. |
| Cooling Time | Determines part solidification, dimensional stability, overall cycle time. |
Mastering these parameters is key to mastering injection molding.
What are the 4 variables of injection molding?
Feeling like you’re juggling too many settings when trying to get injection molding just right? It can certainly seem complex with all the adjustments possible. However, focusing on the four core variables can simplify troubleshooting and help you gain better control over the entire process.
The four fundamental variables in injection molding that interact to determine part quality are typically considered: Temperature (of both the melt and the mold), Pressure (including injection and holding pressures), Time (encompassing injection, cooling, and overall cycle times), and Flow Rate/Speed (the speed at which plastic is injected). Adjusting these variables correctly and understanding their interplay is key to successful molding.

Let’s break down these four overarching variables. They are not always independent; a change in one often affects others.
- Temperature: This is a broad category. It includes the temperature of the plastic melt as it leaves the nozzle (melt temperature), the temperature settings along the different zones of the heating barrel, and critically, the temperature of the mold itself. Consistent and appropriate temperatures are vital for proper material flow, part solidification, and surface finish. For example, if the mold is too cold, the plastic might solidify too quickly, leading to incomplete parts or poor surface quality.
- Pressure: This variable covers several aspects. There’s the primary injection pressure that pushes the molten plastic into the mold. Then there’s holding pressure (or packing pressure) applied after the mold is filled to compensate for shrinkage. Back pressure, applied during the screw’s recovery phase, also plays a role in melt consistency and mixing. Getting these pressures right ensures the mold is filled correctly and the part is dense and dimensionally stable.
- Time: Several time elements are crucial. Injection time is how long it takes to fill the mold. Holding time is the duration for which holding pressure is applied. Cooling time is the period the part remains in the mold to solidify. All these contribute to the overall cycle time, which directly impacts production efficiency.
- Flow Rate/Speed: This refers to how quickly the molten plastic is injected into the mold cavity. It’s not just about one speed; often, an injection speed profile (varying speeds at different points of fill) is used. The flow rate affects how the plastic fills the mold, the orientation of polymer chains, potential for shear stress, and the formation of defects like weld lines or jetting.
I once had a project with a very long, thin part. We had to carefully profile the injection speed – starting slower to avoid jetting, then increasing speed to fill the part quickly before it cooled, and then slowing down again at the end of fill. It was a real lesson in how these four variables are deeply interconnected. You can’t just change one without considering the others.
Here’s how these variables encompass various settings:
| Variable | Aspects Covered |
|---|---|
| Temperature | Melt temperature, barrel zone temperatures, nozzle temperature, mold temperature. |
| Pressure | Peak injection pressure, holding pressure profile, back pressure. |
| Time | Injection fill time, holding pressure time, cooling time, overall cycle time. |
| Flow Rate | Injection speed or velocity, injection speed profile during mold filling. |
Understanding these four main variables provides a solid framework for optimizing any injection molding process.
Conclusion
The key points of injection molding revolve around a precise, cyclical process, careful control of critical parameters like temperature and pressure, and the foundational elements of good mold design and appropriate material selection. Grasping these basics, steps, and variables is essential. I hope this explanation from CavityMOLD helps you produce high-quality, consistent plastic parts efficiently and cost-effectively.
