

Injection molding makes plastic parts by forcing a heated polymer melt into a shaped mold, allowing it to pack, cool, and release in repeatable cycles. The process is valuable for production because one tool can reproduce the same geometry many times, but quality depends on the part design, resin grade, mold, machine, and process window working together.
What is plastic injection molding?
Thermoplastic pellets are heated and plasticized in the injection unit, pushed through a feed system, and formed in the mold cavity. Once the part is sufficiently cool, the mold opens and the ejection system removes it. The cavity shape is only one part of the result: shrinkage, flow, cooling, fiber orientation, packing, and ejection all influence the final dimensions and appearance.
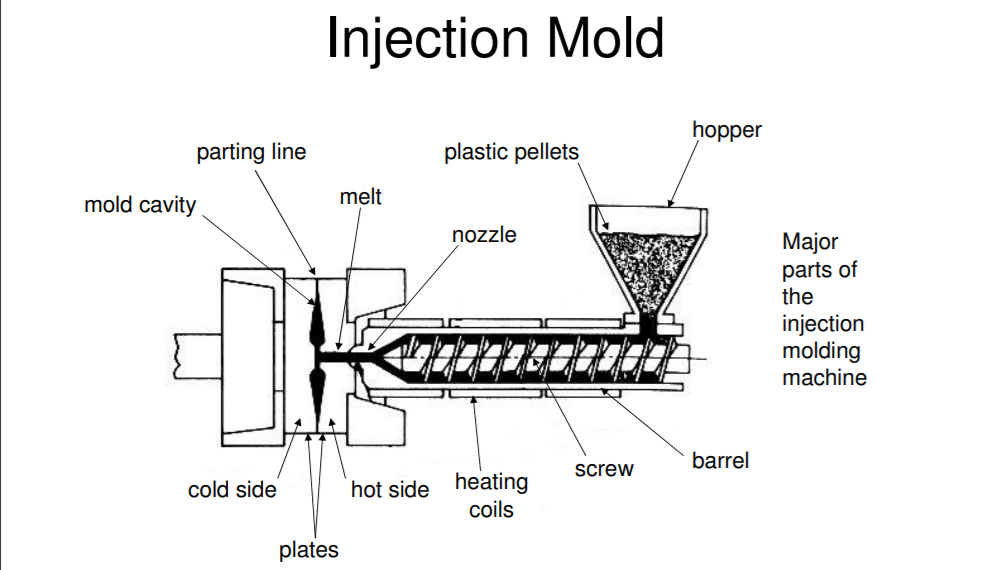
What are the main parts of an injection molding machine?
The injection unit contains the hopper, barrel, heaters, reciprocating screw, check ring, and nozzle. The screw melts and meters the resin, then moves forward to inject it. The clamping unit closes the mold, holds it against injection pressure, opens it after cooling, and drives the ejection sequence.
- Hopper: stores pellets before they enter the barrel.
- Barrel and screw: heat, mix, meter, and inject the polymer.
- Nozzle and sprue: connect the machine to the mold feed system.
- Clamping unit: closes and supports the mold through fill and pack.
- Controller and sensors: manage temperature, velocity, pressure, position, and alarms.
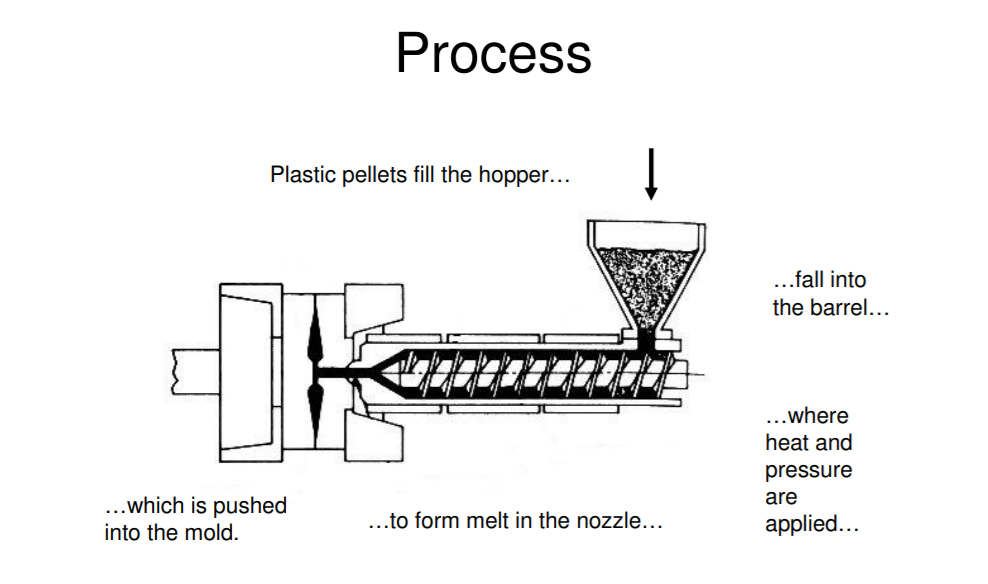
What does the mold do?
The mold contains the cavity and core surfaces that define the part. The sprue, runners, and gates deliver melt; vents allow displaced air to escape; cooling channels remove heat; and ejectors release the part. Slides, lifters, inserts, or unscrewing mechanisms may be added when a feature cannot be released by a straight mold opening.
The four stages of the molding cycle
- Fill: the melt flows through the feed system and fills the cavity. Gate position, wall thickness, flow length, and venting influence pressure and weld-line locations.
- Pack or hold: pressure adds material while the gate remains open, helping compensate for shrinkage.
- Cool: the part remains in the mold until the critical areas are rigid enough to eject without distortion.
- Open and eject: the mold opens and pins, sleeves, stripper plates, or other systems remove the part.
Material selection and part design
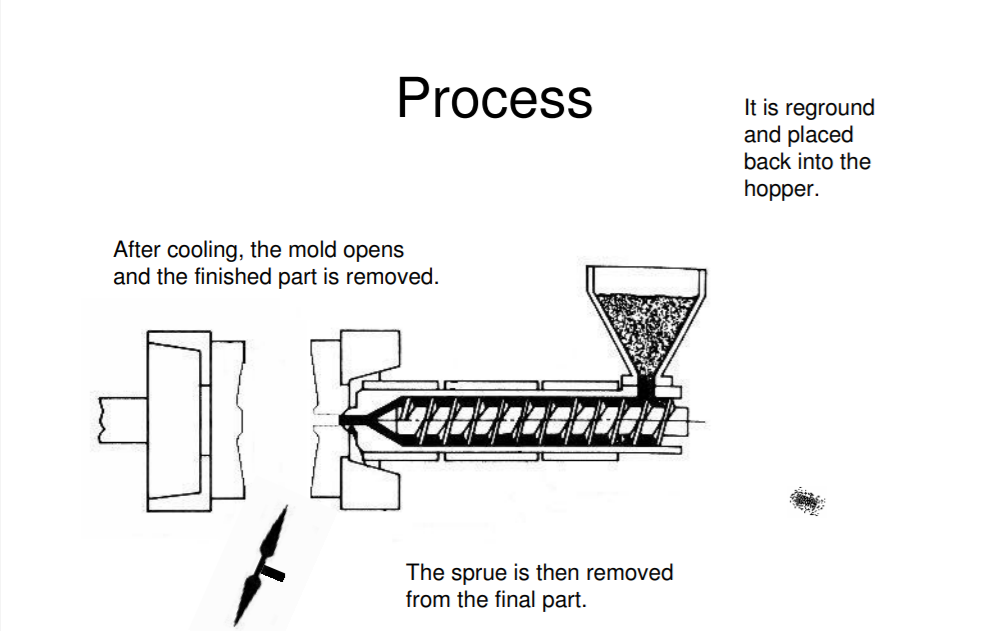
Choose the resin from required stiffness, impact, temperature, chemical exposure, appearance, electrical needs, and regulatory requirements that are actually verified for the project. The exact grade and additives affect flow, shrinkage, drying, mold temperature, wear, and processing limits.
For manufacturability, begin with uniform nominal walls, gradual transitions, draft, radii, cored-out bosses, manageable ribs, and a clear mold-opening direction. Review gates, weld lines, cooling, ejection, and texture before releasing the tool. Link these decisions to DFM engineering rather than waiting for defects after machining.
Advantages and limitations
| Strength | What it enables | Limit to manage |
|---|---|---|
| Repeatable tooling | Consistent geometry over a production run | Tool cost and maintenance must fit quantity |
| Complex geometry | Ribs, bosses, textures, inserts, and multiple features in one part | Undercuts and tight tolerances may add slides, lifters, or inspection effort |
| Fast recurring cycles | Efficient production after the tool and process are stable | Cooling, packing, and ejection can dominate cycle time |
| Material flexibility | Many thermoplastic families and grades are available | Each grade has its own data sheet and process window |
What should an OEM team provide?
- 3D CAD, 2D drawing, material grade, color, texture, and cosmetic zones.
- Annual volume, order quantity, target timing, packaging, and assembly requirements.
- Critical dimensions, tolerances, datums, test method, and acceptance criteria.
- Whether the requirement is tooling only, molded parts, or a complete engineering-to-production workflow.
Useful next steps include mold making, CNC and EDM machining, and injection molding production. Send the project files for a practical review. For process fundamentals, see Autodesk’s fill, pack, and cooling overview.
The OEM handoff map
Product engineering defines function, interfaces, critical dimensions, appearance, and environment. Tooling translates those requirements into parting, gates, cooling, ejection, and inspection access. Quality defines sample measurements and tests before release. Procurement compares quotations against the same assumptions.
- Part: CAD, drawing revision, datums, tolerance notes, cosmetic zones, and inserts.
- Material: exact grade, color, additive or reinforcement, drying, alternatives, and change control.
- Volume: annual demand, batch size, ramp, cavity preference, spare-tool strategy, and packaging.
- Quality: sample quantity, measurement method, functional tests, appearance standard, and approval authority.
Unknowns should be marked as open decisions, especially shrinkage, texture, mold life, and conditioning. Autodesk’s cycle terminology is a common reference, but the selected resin and geometry control the process. Start with an engineering review or send the brief through the contact page.