Are you feeling stuck trying to figure out the correct interior wall thickness for your project? Getting this detail wrong can lead to big problems with fittings, structural integrity, and budgets. I’m here to show you exactly how to determine it, making the process simple and clear.
Interior wall thickness is determined by adding the width of the internal frame (usually a wood or metal stud) to the thickness of the wall covering (like drywall) on both sides. The final dimension depends on critical factors like structural load requirements, local building codes, and special needs for things like plumbing, insulation, or soundproofing.
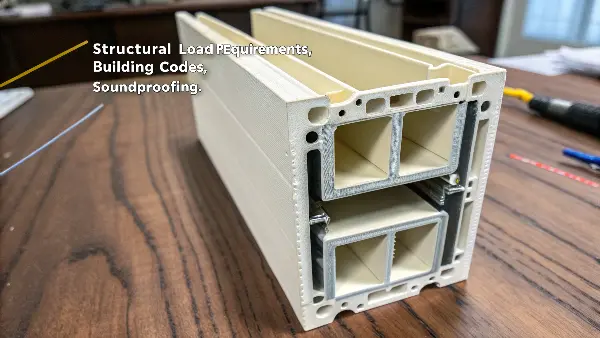
Understanding these basic components is the first step. But this is more than just a simple addition problem. The requirements for each part can change, which changes the final thickness. It might seem a bit complicated at first, but don’t worry. I’m going to break it all down for you so you can move forward with confidence on your project. Let’s dig in and get this right.
What is the actual thickness of an interior wall?
Have you ever been confused because a "2×4" stud isn’t actually two inches by four inches? This common mix-up between nominal and actual sizes can cause real headaches and lead to miscalculations in your designs. I’ll clear up this confusion to help you avoid those errors.
The actual thickness of a standard modern interior wall is typically 4.5 inches (about 114 mm). This measurement comes from a 3.5-inch-deep wood or metal stud, plus one sheet of 1/2-inch-thick drywall on each side. The math is simple: 3.5 inches + 0.5 inches + 0.5 inches equals 4.5 inches. This can vary if thicker drywall or different studs are used.
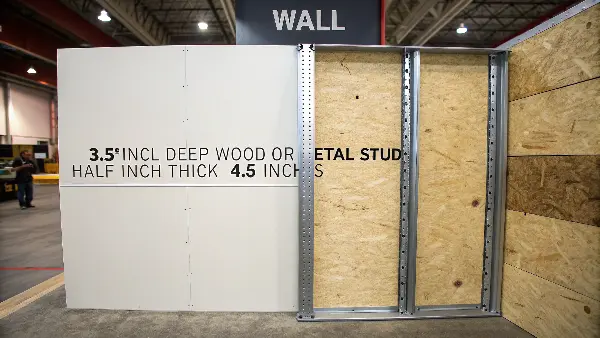
To really understand wall thickness, you have to know the difference between "nominal" and "actual" dimensions. This is especially true for lumber. A "2×4" stud is a great example. Decades ago, it was closer to 2 inches by 4 inches. Today, after the wood is dried and planed smooth, its actual dimensions are 1.5 inches by 3.5 inches. For wall thickness, we only care about the 3.5-inch measurement.
The same applies to other common stud sizes.
Common Stud Sizes: Nominal vs. Actual
| Nominal Size | Actual Dimensions | Typical Use |
|---|---|---|
| 2×4 | 1.5" x 3.5" | Standard interior walls |
| 2×6 | 1.5" x 5.5" | Load-bearing or plumbing walls |
| 2×8 | 1.5" x 7.25" | Walls requiring extra strength or space |
The other key part of the equation is the drywall. The standard thickness for interior walls is 1/2 inch. However, you might use 5/8-inch drywall, often called Type X, in areas that require better fire resistance or sound-dampening, like in a garage or a media room.
When you put it all together, the 3.5-inch depth of the stud creates the cavity of the wall, and the drywall on each side closes it in. This total thickness is critical for project managers like you, as it directly affects the specifications for door frames, window jambs, and electrical boxes.
How thick does an internal wall need to be?
Choosing the right wall thickness can feel like guesswork if you’re not sure what to look for. But picking the wrong size isn’t a small mistake. It can mean failing building inspections, creating a weak structure, or not meeting the functional needs of the space. Let’s make sure you understand the requirements.
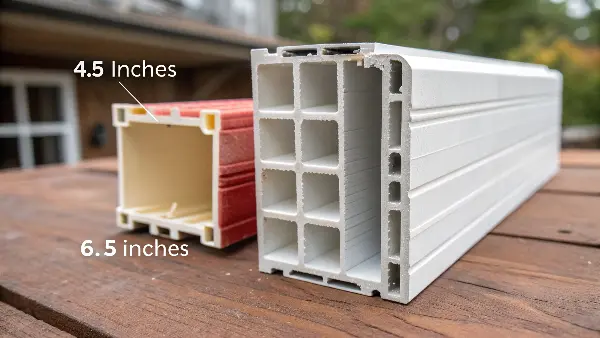
An internal wall must be thick enough to satisfy structural loads, local building codes, and any special functions like fire resistance or soundproofing. For most non-load-bearing walls, the standard 4.5-inch thickness is perfectly fine. However, load-bearing walls or "wet walls" with plumbing often need to be thicker, usually using 2×6 studs for a total thickness of around 6.5 inches.
Several factors determine how thick a wall needs to be. It’s not a one-size-fits-all situation. The decision is a balance between rules, function, and physics.
Load-Bearing vs. Non-Load-Bearing Walls
The first thing to identify is the wall’s job. A load-bearing wall supports the weight of the floor or roof above it. It’s a key part of the building’s skeleton. Because of this stress, these walls are almost always built with stronger, wider studs, like 2x6s. This gives them a total thickness of 6.5 inches (5.5" stud + 0.5" drywall + 0.5" drywall). A non-load-bearing wall, on the other hand, only has to support its own weight. Its main job is to divide a room, so a standard 4.5-inch wall built with 2×4 studs is usually enough.
Building Codes and Fire Safety
Building codes are the law. They set the minimum standards for safety and construction in your area. These codes often specify wall thickness requirements, especially for fire safety. For example, the wall separating a house from its garage often needs a specific fire rating, which may require using 5/8-inch Type X fire-resistant drywall instead of the standard 1/2-inch sheets. This adds a quarter-inch to the total thickness but greatly improves safety.
Special Functional Walls
Sometimes, a wall needs to do more than just stand there.
- Plumbing Walls: If a wall needs to hide water supply lines and large drainpipes, it has to be thicker. A standard 3-inch drainpipe won’t fit in the 3.5-inch cavity of a 2×4 wall. That’s why "wet walls" in kitchens and bathrooms use 2×6 studs, providing a 5.5-inch cavity.
- Soundproofing: To reduce noise between rooms, you might need a thicker wall. This can be achieved by using thicker drywall, adding a second layer of drywall, or using special techniques like resilient channels that separate the drywall from the studs to absorb vibrations.
How to decide wall thickness?
You know the different options for wall thickness, but how do you actually make the final call for your project? Making the wrong choice can waste materials and blow your budget, or even worse, result in a wall that doesn’t do its job. I’ll give you a straightforward framework to make the right decision every time.
To decide on wall thickness, first determine if the wall is load-bearing. After that, check your local building codes for any minimum requirements. Then, list any special needs like plumbing, electrical conduits, insulation, or soundproofing. Finally, weigh these functional needs against your project’s budget and space limits to pick the right stud size and drywall type.
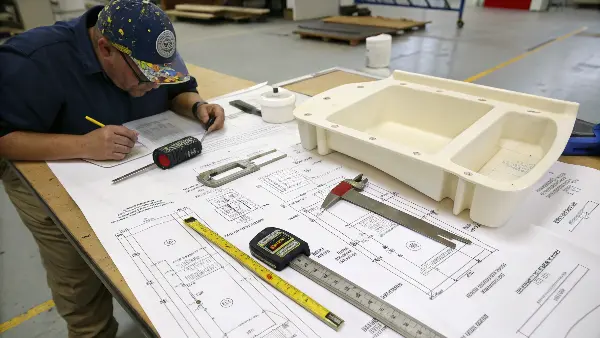
As a project manager, your job is to make informed decisions that balance many competing factors. Here is a simple, step-by-step process you can follow to choose the correct wall thickness with confidence.
Step 1: Identify the Wall’s Function
Start with the most basic question: What is this wall for? Look at the architectural plans. Is it marked as a structural, load-bearing wall? Is it simply a partition to create two smaller offices from one large one? Or is it a utility wall that needs to house plumbing and vents for a kitchen? This first step will immediately narrow down your options.
Step 2: Consult Codes and Blueprints
Never guess. Your project’s blueprints and your local building codes are your most important guides. The blueprints will specify the intended stud size for each wall. The building codes will tell you the legal minimums for things like fire resistance between different spaces. Always cross-reference what’s on the plan with what’s required by law.
Step 3: Analyze Special Requirements
Think beyond the basics. Does the wall need to contain a pocket door that slides into it? Will it need extra soundproofing for a conference room or a quiet home office? Do you need to run oversized electrical conduits? Each of these special features may require a thicker wall to work properly. Make a checklist for each wall to ensure you don’t miss anything.
Step 4: Weigh the Trade-offs
Finally, you need to balance everything against cost and available space. A thicker wall costs more in materials and labor. It also eats up a little more floor space, which can be a critical factor in smaller areas. I find a simple table helps clarify these trade-offs.
| Factor | Standard 4.5" Wall | Thicker 6.5" Wall |
|---|---|---|
| Cost | Lower material & labor cost. | Higher material & labor cost. |
| Space | Consumes less floor space. | Consumes more floor space. |
| Function | Best for simple partitions. | Essential for plumbing and structure. |
| Performance | Basic sound and heat insulation. | Superior sound and heat insulation. |
Using this structured approach, you can justify your decision to your team and stakeholders, ensuring the wall you build is the right one for the job.
How to measure interior wall thickness?
Do you need to measure an existing wall but want to avoid drilling a hole just to find out its thickness? Guessing is risky and can lead to buying the wrong size door, trim, or fixtures. I’ll show you a few easy, non-destructive methods to get an accurate measurement every time.
The simplest way to measure an interior wall’s thickness is at a doorway. Just use a tape measure on the door jamb, which is the flat frame lining the opening. Its width is manufactured to match the wall’s total thickness. If you don’t have a doorway, you can often get a good measurement by carefully removing an electrical outlet cover.
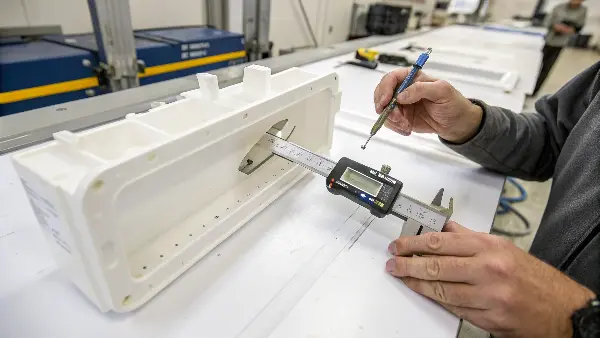
Getting a precise measurement of an existing wall is essential for renovations, repairs, or additions. Fortunately, you don’t need any special tools. Here are three reliable methods I use on my projects.
Method 1: The Doorway Technique
This is by far the easiest and most accurate method. Every pre-hung interior door comes with a jamb that is built to fit a specific wall thickness perfectly.
- Go to any interior doorway in the wall you want to measure.
- Identify the door jamb. This is the flat wood or Getafe that lines the opening where the door sits.
- Place your tape measure across the jamb, from its inside edge to its outside edge. Don’t include the decorative trim (called casing) in your measurement.
- The number you read is the thickness of your wall. If it reads 4.5 inches, you have a standard 2×4 wall. If it reads 6.5 inches, you have a 2×6 wall. It’s that simple.
Method 2: The Outlet Cover Trick
If there’s no door in the wall, an electrical outlet or light switch offers another way in.
- Safety First! Go to your breaker box and turn off the power to the outlet or switch you will be working on.
- Use a screwdriver to remove the small screw(s) holding the cover plate on.
- Gently pull the cover plate away from the wall. Now you can see the gap between the electrical box and the drywall surface. You can often measure the drywall thickness here. If it’s 1/2 inch, you can assume it’s a standard 2×4 wall (4.5 inches total) unless you have reason to believe it’s thicker. While less direct, it’s a good clue.
Method 3: The Room Dimension Calculation
I ran into a tricky situation once on a job where I had to measure a wall in a fully sealed closet with no doors or outlets. What we did was simple but clever.
- First, we measured the room’s Interior Dimension (ID) from one wall to the opposite wall. Let’s say it was 5 feet.
- Then, we measured the Exterior Dimension (OD) from the outer faces of those same walls. Let’s say it was 5 feet, 9 inches.
- The total difference was 9 inches. Since that 9 inches accounts for two walls, we just divided by two. That told us each wall was 4.5 inches thick. This method is great for when you can’t access a jamb or an opening.
Conclusion
Determining interior wall thickness doesn’t have to be complicated. It’s the sum of its parts: the stud and the drywall on each side. While 4.5 inches is standard, the final dimension depends on structural loads, plumbing, and codes. Making the right choice is a matter of balancing function and budget.
