Are you tired of dealing with defects like warping, sink marks, or poor surface finishes in your injection molded parts? These issues often lead to project delays and increased costs, creating a lot of frustration. The secret to solving many of these problems lies in mastering one critical parameter: mold temperature.
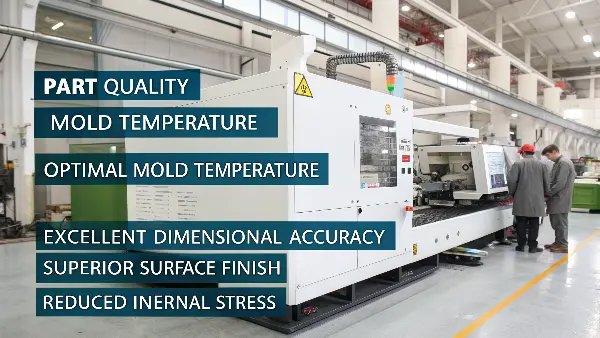
The optimal mold temperature is crucial for injection molding success. It directly controls how the plastic cools and solidifies inside the mold cavity. Getting it right ensures your parts have excellent dimensional accuracy, superior surface finish, and minimal internal stress. This leads to higher quality components, fewer rejects, and a more efficient production cycle. It’s the foundation for a predictable and reliable manufacturing process.
Understanding mold temperature isn’t just about setting a dial and hoping for the best. It’s a science that balances material properties, part design, and production goals. In my years of experience at CavityMold, I’ve seen countless projects succeed or fail based on how well this single factor was controlled. It’s the difference between a smooth production run and a series of frustrating headaches. Let’s walk through what you need to know to get it right every time and ensure your projects run smoothly.
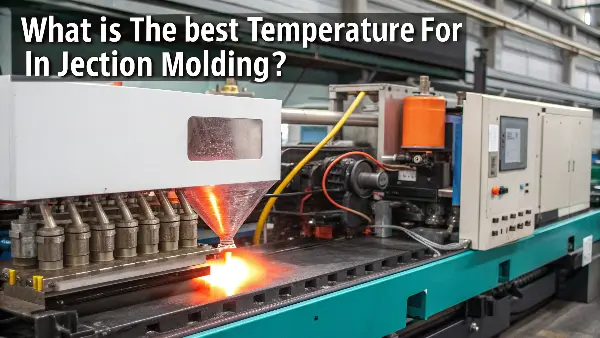
What is thé best temperature for injection molding?
Are you constantly guessing what the right mold temperature should be? Using a "one-size-fits-all" approach can lead to inconsistent part quality, from brittle components to ugly surface defects. To get reliable results, you need a more targeted strategy that respects the material you’re working with.
The best temperature for injection molding depends almost entirely on the type of plastic resin being used. Crystalline plastics like Nylon or PET require a higher mold temperature to achieve proper crystal structure and stability. In contrast, amorphous plastics like ABS or Polycarbonate perform better with a lower mold temperature to ensure they set correctly without warping.
Getting this right is fundamental. I remember a project involving a high-gloss consumer electronics housing made from PC/ABS. The initial runs were a disaster; the parts had flow lines and dull spots. The operator was using a generic temperature setting that was too low. The material wasn’t flowing smoothly and replicating the polished surface of the mold. By raising the mold temperature to the higher end of the recommended range for that specific blend, the plastic flowed like honey, filled the cavity perfectly, and produced a beautiful, flawless finish. This experience taught me that you can’t fight the material’s nature; you have to work with it.
Crystalline vs. Amorphous Plastics
The most important factor influencing your temperature choice is the plastic’s molecular structure. Plastics fall into two main families: amorphous and crystalline.
- Amorphous Plastics: These materials have a random, jumbled molecular structure. They soften over a wide range of temperatures. Think of materials like ABS, Polystyrene (PS), and Polycarbonate (PC). They generally require lower mold temperatures because you just need to cool them until they are rigid enough to eject.
- Crystalline Plastics: These materials have an orderly, crystal-like molecular structure. They have a very specific melting point. Examples include Nylon (PA), Polypropylene (PP), and PET. They need a higher mold temperature. This might seem strange, but a warmer mold allows the molecules time to align and form their strong crystalline structures as they cool. If you cool them too quickly, this structure won’t form properly, resulting in a weaker, more brittle part.
The Impact of Incorrect Temperatures
Setting the temperature outside the ideal range for your chosen material can cause a variety of predictable defects. Understanding these helps in troubleshooting on the factory floor.
| Temperature Issue | Potential Defects | Why It Happens |
|---|---|---|
| Mold Too Cold | Short shots, weld lines, poor surface finish, cracks. | The plastic freezes before it completely fills the mold cavity. The melt fronts don’t fuse together properly. |
| Mold Too Hot | Flash, sink marks, warping, long cycle times. | The plastic stays molten for too long, allowing it to seep out of parting lines (flash) or shrink unevenly (warping). |
Finding the sweet spot often involves starting with the material supplier’s recommendation and then making small adjustments based on the actual parts you are producing.
How do you determine the ideal mold temperature?
Do you find yourself in a constant cycle of trial and error, adjusting temperatures and hoping the next shot is better? This guessing game is inefficient and wastes time, material, and money. A systematic approach is needed to nail down the right process parameters from the start.
To determine the mold temperature, begin with the material manufacturer’s datasheet, which provides a recommended range. Then, refine this based on your part’s specific geometry, required surface finish, and target cycle time. This data provides a solid starting point that you can fine-tune during initial trials for optimal results.
A methodical approach saves so much trouble down the line. For a medical device component we manufactured, the material was a special grade of PEEK. The datasheet gave a very high temperature range, close to 200°C (392°F). The part also had a very thin wall section, less than 1mm thick. We knew from experience that a thin wall would require the temperature to be on the higher end of the range to prevent the plastic from freezing before the mold was full—a defect called a short shot. By analyzing the datasheet and the part geometry before the first trial, we set the temperature correctly and achieved a perfect fill on the very first attempt.
Start with the Material Datasheet
This is your single most important resource. The company that made the plastic has tested it extensively. Their datasheet will give you a process window, including a recommended mold temperature range. Never ignore this. It’s the foundation of your entire process setup. If you run the mold outside this range, you are inviting problems and may not get the mechanical properties the plastic is supposed to have.
Analyze Part Geometry
The shape and size of your part play a huge role.
- Wall Thickness: This is the most critical geometric feature.
- Thick Walls (>3mm): Thicker sections take much longer to cool. You might need a slightly cooler mold to help the heat escape and prevent sink marks or voids from forming in the center. However, the cycle time will be longer regardless.
- Thin Walls (<1.5mm): Thin walls cool very fast. You often need a hotter mold to ensure the plastic can travel through the entire cavity and fill all the details before it solidifies.
Consider Surface Finish Requirements
The final look and feel of the part also dictates temperature.
| Desired Finish | Typical Mold Temperature Requirement | Reason |
|---|---|---|
| High Gloss / Polished | Hotter End of Range | Allows the plastic to perfectly replicate the smooth mold surface. |
| Matte / Textured | Mid-to-Lower End of Range | A hotter mold can sometimes cause textured parts to stick or eject poorly. |
| No Cosmetic Needs | Lower End of Range (for speed) | If appearance doesn’t matter, you can run cooler to shorten the cycle time. |
A hotter mold surface gives the polymer molecules time to relax and lay flat against the steel, creating a perfect copy of the surface. For a mirror-like finish, you need a hot, highly polished mold.
What factors help maintain the operating temperature of a mold?
You’ve found the perfect temperature, but your parts are still inconsistent from one shot to the next. Why? Setting the temperature is one thing; maintaining it is another. Fluctuations during a production run can undo all your hard work and lead to a batch of rejected parts.
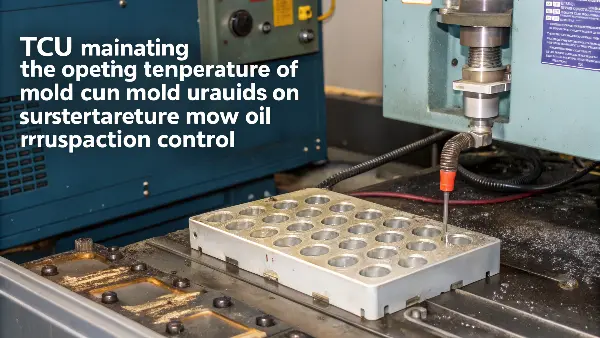
Maintaining a stable operating temperature depends on the mold’s cooling system design and the Temperature Control Unit (TCU). Key factors include the cooling medium (water or oil), the flow rate through the channels, and the layout of those channels. Effective and consistent heat removal is essential for a stable process.
I once faced a challenge with a large, complex automotive part that had persistent warping issues. The TCU was set correctly, but one side of the part always cooled faster than the other. After investigating, we found that the cooling channels were simple, straight-drilled lines that couldn’t effectively cool the complex contours of the part. We re-designed the mold to include conformal cooling channels, which follow the shape of the part. This ensured even heat extraction across the entire surface. The warping vanished, and the part became stable. It showed me that the design of the cooling circuit inside the mold is just as important as the external controller.
The Temperature Control Unit (TCU)
The TCU, also known as a thermolator, is the heart of your temperature management system. It’s a pump and a heater/chiller in one box. It circulates a fluid—either water or oil—through channels inside your mold to add or remove heat as needed. A reliable TCU is critical. It must maintain the fluid at a consistent temperature and ensure a turbulent flow rate, which is much more effective at transferring heat than a smooth, laminar flow.
Water vs. Oil as a Medium
The choice of fluid depends on the required temperature range.
| Fluid | Temperature Range | Pros | Cons |
|---|---|---|---|
| Water | Up to 95°C (203°F) | Excellent heat transfer, cheap, easy. | Limited temperature range, can cause rust/scaling. |
| Oil | Up to 300°C (572°F) or higher | Very high temperature capability. | Poorer heat transfer, messy, potential fire hazard. |
For most common plastics like Polypropylene or ABS, water is perfectly fine. For high-temperature engineering plastics like PEEK or LCP, oil is necessary to reach the required mold temperatures.
Cooling Channel Design
This is where expert mold design really shines. The placement, diameter, and path of the cooling channels determine how effectively and evenly the mold is cooled.
- Conventional Cooling: These are straight lines drilled through the mold steel. They are simple and cheap but can be inefficient for complex part shapes, often leaving hot or cold spots.
- Conformal Cooling: These channels follow the contours of the mold cavity and core. They provide much more uniform cooling, which is ideal for reducing cycle times and minimizing part warpage. While more expensive to build, the investment often pays for itself through higher quality parts and faster production. The distance from the channel to the cavity surface is critical—too close and you get cold spots; too far and cooling is inefficient. At CavityMold, we use mold flow analysis to simulate and optimize these channel layouts for every project.
How many degrees of draft is required for shutoff surfaces on a molded part?
Are your parts getting stuck, scuffed, or damaged during ejection? This is a common and costly problem that can halt production. While mold temperature affects how a part shrinks, a fundamental design feature—the draft angle—is the key to a smooth release.
A minimum of 1 to 2 degrees of draft is the general rule for most part surfaces. However, for shutoff surfaces, where two mold halves slide against each other, 3 degrees or more is highly recommended. Textured surfaces also require more draft, often 1 additional degree for every 0.025mm of texture depth.
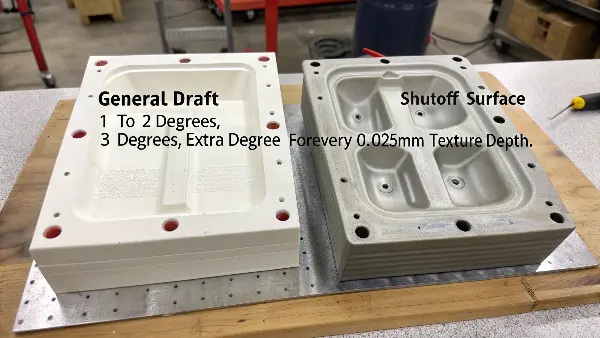
This is one of those non-negotiable rules of injection molding. I’ve learned the hard way that trying to "cheat" on draft angles almost never works. When a plastic part cools, it shrinks and grips tightly onto the mold core. The draft angle provides a slight taper that allows the part to break free easily as the ejector pins push it out. Without it, the ejector pins can push right through the part, or the surface can be dragged and scraped, ruining the finish. A shutoff surface has an even higher risk of friction, so providing ample draft there is critical for protecting the mold itself from wear and tear.
Why Draft and Temperature Work Together
Mold temperature and draft angles are a team. Here’s how they connect:
- Shrinkage: Mold temperature directly influences how much the part shrinks. A hotter mold might allow for more uniform shrinkage, while a poorly controlled temperature can cause the part to warp and grip the core unevenly, making ejection difficult even with proper draft.
- Ejection: A part that is not cooled enough (mold too hot or cycle too short) will be soft and can be damaged by ejector pins. A part that is cooled too much might be more brittle and prone to cracking.
- Troubleshooting: If parts are sticking, it’s important to ask the right questions. Is it because of insufficient draft (a design problem)? Or is it because the part isn’t cooling properly (a temperature problem)? Both must be correct for a smooth process.
General Draft Angle Guidelines
While every part is unique, here are some reliable starting points that we use at CavityMold every day. These are especially vital for a Project Manager like Alex to have in mind during the initial design phase.
| Feature Type | Recommended Minimum Draft Angle | Reason |
|---|---|---|
| Smooth Vertical Walls | 1 – 2 degrees | Standard for easy release with minimal friction. |
| Light Texture (e.g., VDI 27) | 3 degrees | The texture creates tiny undercuts that require more angle to clear. |
| Heavy Texture (e.g., leather) | 5+ degrees | Deeper textures need significant draft to avoid scraping the pattern off. |
| Shutoff Surfaces | 3+ degrees | High friction area where mold faces slide; needs extra taper for tool life. |
Always remember: more draft is always better if the part design allows for it. It’s one of the best forms of insurance you can build into your part to guarantee successful manufacturing.
Conclusion
Mastering mold temperature isn’t black magic; it’s a core engineering skill. By starting with the material datasheet, analyzing your part’s design, and using a robust temperature control system, you can eliminate guesswork. This ensures consistent, high-quality parts and makes your entire production process more efficient and predictable.
