Struggling to get that perfect, durable soft-touch grip on your polypropylene kitchen products? It’s frustrating when overmolded parts peel or fail, leading to unhappy customers and costly rework. What if you could nail the process every time, creating a seamless, reliable bond that lasts?
To successfully overmold TPE on PP, you must focus on three core areas: material compatibility, mechanical design, and process control. This means selecting a TPE grade specifically designed to bond with PP, incorporating physical interlocks in the PP part, and precisely managing melt temperatures to ensure a strong chemical and mechanical bond.
I’ve seen this process from every angle over my years in the industry. It’s a fantastic technique, but it can be tricky. A lot of folks think you can just pick any TPE and PP and squirt one onto the other. It’s just not that simple. But don’t worry, I’m here to walk you through the stuff that really matters. Let’s dive into the details that separate a product that fails from one that customers love.
Why Is the TPE-PP Bond So Critical for Kitchenware?
Ever bought a spatula and had the soft grip start peeling off after a few runs through the dishwasher? It’s not just annoying; it’s a total product failure. This is why getting that TPE-to-PP bond right isn’t just a technical detail—it’s everything for a kitchen product.
The bond is critical for three main reasons: user safety, long-term durability, and hygiene. A strong bond prevents the grip from slipping during use, ensures it survives repeated washing and heat exposure, and eliminates gaps where food particles and bacteria can get trapped, making the product unsafe and unsanitary.
When I first started, I worked on a project for a set of measuring cups. The team was so focused on the look and feel, they kind of overlooked the bonding chemistry. The initial prototypes looked great! But after a few weeks of testing—which included daily dishwasher cycles—the TPE grips started to lift at the edges. It was a disaster waiting to happen. Imagine someone picking up a cup full of hot water and the grip just gives way. That’s a safety nightmare.
This experience taught me a valuable lesson. The bond is more than just glue; it’s the foundation of the product’s performance and safety.
Deeper Dive: The Three Pillars of a Great Bond
A great bond in kitchenware relies on a mix of chemical adhesion and mechanical strength.
- Safety First: The primary function of a TPE grip is to be non-slip. If the bond fails, the grip can rotate or slide off the rigid PP core. This is incredibly dangerous when dealing with hot foods, sharp utensils, or heavy containers. A secure bond ensures the grip is a true safety feature, not a liability.
- Durability and Longevity: Kitchen environments are tough. Products are exposed to hot water, detergents, oils, and acidic foods. A weak chemical bond will quickly degrade under these conditions. The TPE will harden, crack, or peel away from the PP substrate. A strong, correctly formulated bond is designed to withstand this abuse, ensuring the product has a long and useful life. This is what keeps customers happy and builds brand loyalty.
-
Hygiene is Non-Negotiable: This is a big one that often gets missed. If the TPE starts to peel, it creates a tiny gap between the soft grip and the hard plastic. What loves to live in that gap? Food particles, moisture, and bacteria. It becomes a breeding ground for germs that you can’t easily clean. A seamless, permanent bond eliminates these crevices, making the product easy to clean and truly hygienic. Bond Quality Safety Impact Durability Hygiene Strong Bond Grip is secure, prevents accidents. Withstands dishwashing and daily use. No gaps for bacteria to grow. Weak Bond Grip can slip or detach, causing spills. Peels, cracks, or hardens quickly. Creates crevices that trap germs. So, when we talk about bonding TPE to PP, we’re really talking about building a product that is safe, durable, and clean.
How Do You Choose the Right TPE and PP Grades for the Job?
Walking into the material selection process feels like standing in a supermarket aisle with a thousand different kinds of cereal, right? Pick the wrong one, and your whole project could end up a soggy mess. Choosing the right TPE and PP is exactly like that—it’s the most important first step.
To choose the right materials, focus on chemical compatibility. Select a TPE grade specifically formulated for adhesion to polypropylene. Try to match the Melt Flow Index (MFI) of both materials. Also, consider the required hardness (Shore A) for the TPE grip and, crucially, ensure both materials are food-grade certified.

I remember a project manager, a bit like Alex, who came to us with a beautiful design for a container lid. The problem was, their engineering team had already specified a standard PP and a random TPE they got a good deal on. They just wouldn’t bond. No matter what we did with the processing, they came apart with a simple tug. We had to go back to square one on material selection. It was a costly delay, but it taught everyone a lesson: the materials have to be friends first.
Deeper Dive: Making a Material Match
It’s all about finding a pair that wants to stick together. Here’s what I focus on when guiding clients through selection.
- Chemical Compatibility is King: This is the big one. You can’t just use any TPE. You need a grade from a TPE family (like SEBS or TPO) that is specifically engineered to form a chemical bond with polypropylene. Material suppliers have entire product lines dedicated to this. Don’t be shy—call the supplier and tell them, "I need a food-grade TPE that bonds to this specific grade of PP." They’ll be your best friend.
- Hardness (Shore Durometer): This determines the "feel" of the grip. Hardness is measured on a Shore A scale for soft TPEs. For a kitchen utensil grip, you’re typically looking for something in the 40A to 70A range. 40A is very soft and grippy (like a gel insole), while 70A is firmer but still flexible (like a rubber spatula tip). The choice depends entirely on the desired user experience.
- Melt Flow Index (MFI): Think of MFI as the material’s "runniness" when melted. For overmolding to work well, you want the MFI of the TPE and the PP to be in a similar ballpark. If the TPE’s MFI is much higher (more runny) than the PP’s, it can flash easily. If it’s too low (too stiff), it might not fill the mold completely. Aim for harmony.
-
Food-Grade Certification: This is not optional for kitchenware. Both the PP substrate and the TPE overmold material must be certified as food-safe by relevant bodies like the FDA (in the US) or LFGB (in Europe). Always ask for the certificates from your supplier. Selection Criteria What to Look For Why It Matters Compatibility TPE grade specifically made for PP adhesion. Ensures a strong, permanent chemical bond. Hardness 40A – 70A Shore for most grips. Defines the product’s feel and comfort. Melt Flow Index Similar MFI for both TPE and PP. Promotes a smooth, defect-free molding process. Certification FDA or LFGB food-grade approval. Absolutely essential for user health and safety. Getting this right saves you so much time and money down the road. It’s worth the extra effort upfront.
What Are the Key Design Rules for Overmolding TPE on PP?
You’ve got the perfect materials. Great! But if the part isn’t designed for overmolding, you’re still setting yourself up for failure. A good design doesn’t just rely on the chemical bond; it creates a physical one, too. It’s like using both glue and screws to hold two pieces of wood together.
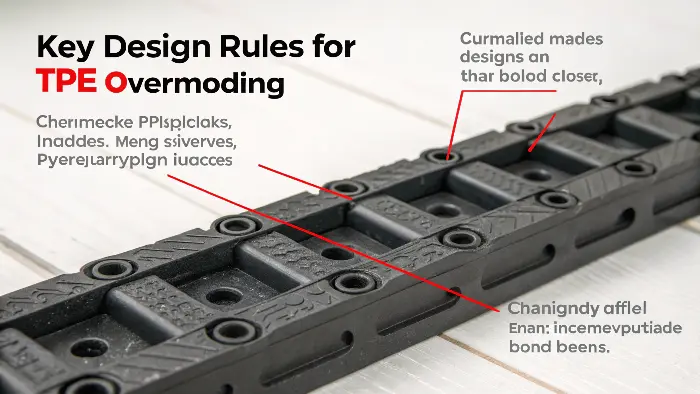
The most important design rule is to create mechanical interlocks in the polypropylene part. These are features like holes, grooves, or channels that give the molten TPE something to flow into and physically grab onto. This dramatically strengthens the bond, making it nearly impossible to separate without destroying the part.

I once had a client who was designing a handle for a heavy-duty kitchen knife. Their initial design was just a smooth PP core with a layer of TPE over it. It looked sleek, but I knew that under the stress of daily chopping, that chemical bond would be fighting a losing battle. I told them, "Think of the TPE as a river. You need to give it channels to flow into and pools to settle in. Otherwise, it’s just flowing over the surface." We added a few simple through-holes and a wrap-around groove. It made the bond bulletproof. That’s the power of designing for the process.
Deeper Dive: Designing for an Unbreakable Bond
Good overmold design is all about giving the TPE a place to go and a reason to stay.
- Mechanical Interlocks are Your Best Friend: This is the core principle. The chemical bond is great, but it needs backup. A mechanical interlock forces the TPE to physically wrap around or flow through the PP substrate. This way, even if the chemical bond were to weaken over time, the TPE is physically trapped.
- Types of Interlocks:
- Through-holes: Small holes in the PP substrate that the TPE flows through, creating a "rivet" of TPE.
- Grooves/Channels: Depressions in the PP surface that the TPE fills.
- Wrap-Arounds: Designing the TPE to wrap around an edge of the PP part.
- Textured Surfaces: A rougher surface on the PP gives the TPE more area to grip.
- Types of Interlocks:
- TPE Wall Thickness: You need to get this just right. A good rule of thumb is to keep the TPE wall thickness between 1.5 mm and 3.0 mm.
- Too thin (<1.0 mm): The TPE might cool too quickly and fail to fill the entire cavity, resulting in a short shot.
- Too thick (>3.0 mm): Can lead to sink marks, longer cooling times (which hurts your cycle time and cost), and a "gummy" feel.
-
Smooth Transitions and Radii: Sharp corners are enemies of good part design, especially in overmolding. They create stress concentrations and can disrupt the flow of the molten TPE. Always use generous radii (rounded corners) where the TPE meets the PP and on any external or internal corners of the TPE itself. This helps the material flow smoothly and makes the final part stronger. Design Feature The "Do" The "Don’t" Bonding Strategy Use mechanical interlocks (holes, grooves). Rely only on the chemical bond. Wall Thickness Keep TPE between 1.5mm – 3.0mm. Go too thin or excessively thick. Part Geometry Use generous radii on all corners. Design sharp, 90-degree corners. Shut-off Design a clear, positive shut-off area. Have a feathered or weak shut-off edge. Thinking about these things at the design stage—long before any steel is cut for the mold—is what separates the pros from the amateurs.
What Are the Biggest Processing Challenges to Watch Out For?
Okay, so you’ve got perfect materials and a brilliant design. Now for the final piece of the puzzle: the actual molding process. This is where the magic happens, but it’s also where things can go wrong fast. Honestly, this stage is less about black magic and more about being a stickler for details.
The biggest processing challenges are managing temperature and preventing contamination. The PP substrate must be at the optimal temperature—not too hot, not too cold—when the TPE is injected. Even a tiny amount of contamination, like oil from a fingerprint or mold release spray, can completely ruin the chemical bond.

Let me tell you a quick war story. We were running a high-volume job for a series of kitchen container lids with a nice TPE seal. Everything was perfect for thousands of parts. Then, suddenly, we started getting failures. The TPE was peeling right off. We checked everything—temperatures, pressures, materials. We were stumped. It turned out a new machine operator on the night shift thought he was being helpful by using a tiny bit of mold release on the PP mold half. That microscopic layer was a bond-killer. It was an expensive lesson in the importance of process discipline and—most importantly—communication!
Deeper Dive: Mastering the Molding Machine
Controlling the process is about consistency. You need to dial in the parameters and then make sure they stay there, shot after shot.
- Temperature, Temperature, Temperature: The single most important variable. For a strong chemical bond, the TPE needs to be injected onto a hot PP substrate. The surface of the PP part needs to be molten or semi-molten to allow the two materials to fuse together at a molecular level.
- Substrate Temperature: This is controlled by the time between the first shot (PP) and the second shot (TPE). In a two-shot rotary platen machine, this is just the time it takes to rotate the mold. Too much delay, and the PP cools too much, weakening the bond.
- Melt Temperature: Both the PP and TPE need to be at their ideal melt temperatures as recommended by the supplier. Too hot, and you risk material degradation. Too cold, and you get poor flow and a weak bond.
- Injection Pressure & Speed: These parameters control how the TPE fills the overmold cavity. You need enough pressure and speed to fill the part completely before it starts to cool, but not so much that it creates flash (where material squeezes out of the mold seams). This is a delicate balancing act that requires a skilled process technician.
- Contamination is the Enemy: I can’t say this enough. The bond area must be perfectly clean.
- Mold Release: Do NOT use it on the PP part or in the TPE cavity. Design the mold with proper draft angles so the part ejects cleanly without it.
- Handling: If you are using a manual transfer process (molding PP, then an operator moves it to another press), the operators must wear clean gloves. Oils from a fingerprint can prevent the bond.
- Drying: Many TPE grades are hygroscopic, meaning they absorb moisture from the air. Molding wet TPE can cause splay marks and brittleness. Always dry your material according to the manufacturer’s specifications before it goes into the machine.
This level of control is why partnering with an experienced molder like us at CavityMold is so important. We’ve made the mistakes, so you don’t have to.Conclusion
So there you have it. Creating a perfect, non-slip TPE grip on a PP kitchen product isn’t rocket science, but it demands attention to detail. Success hinges on a three-legged stool: choosing compatible materials, designing with mechanical interlocks, and maintaining strict control over the molding process. Get those right, and you’ll have a product that’s safe, durable, and reliable.
