Seeing strange snake-like patterns on your parts? This defect, jetting, weakens products and wastes money. So, how do you stop it?
Jetting is a molding defect where molten plastic squirts rapidly through the gate, creating a distinct, often weak, pattern on the part surface. Understanding its causes is key to prevention and getting good quality parts every single time. It’s a real pain!
It’s a real headache, I know. I’ve seen my fair share of jetting issues over the years, and boy, can it be frustrating. You think you’ve got everything set up perfectly, and then bam – there’s that ugly swirl. But don’t worry, we’re going to break it all down. Let’s dive in and figure this out together, so you can get back to making perfect parts. You know, the kind that makes clients happy.
So, What’s This Jetting Thing in Injection Molding, and Why’s It Such a Big Deal Anyway?
Confused by "jetting" talk? It’s a flow issue causing ugly, weak parts. Understanding it helps you make better products and save cash – seriously!
Jetting happens when molten plastic shoots quickly, like a free jet, into the mold cavity without properly touching the mold wall first. This creates distinct patterns and, importantly, structural weaknesses in your final product.
Okay, let me try to explain jetting in simple terms. Imagine you’re trying to fill a pool with a firehose, but instead of aiming the hose so the water flows smoothly along the pool edge, you just point it straight into the middle. The water shoots out in a stream, right? That’s kind of what happens with molten plastic in jetting. It doesn’t gently fill the mold; it squirts in. This uncontrolled stream then folds over itself as the rest of the mold fills, creating those tell-tale worm-like or snake-like marks on the surface.
Why is this a big deal? Well, for starters, it looks awful. If you’re making consumer products, appearance is king. But more than that, these jetting marks are not just surface blemishes. They represent areas where the plastic hasn’t fused properly. This means the part is weaker at these points. I remember one project – gosh, it was years ago – where we had parts failing field tests. Turned out, jetting near a critical feature was the culprit. The parts looked okay-ish, but they just couldn’t take the stress. It cost us a lot in rework and delays. So yeah, jetting can affect strength, appearance, and ultimately, your bottom line. For someone like Alex, a project manager, this means missed deadlines and unhappy customers. Nobody wants that!
How Do I Actually See Jetting, and What Am I Looking For?
Parts looking a bit off? Jetting might be the culprit, hiding in plain sight. Learn to spot it before it causes big problems – it’s not always obvious!
Look for snake-like or worm-like patterns on the part surface, often starting near the gate area. The material there might look different, sometimes duller, shinier, or more stressed than the rest of the part.

Spotting jetting usually isn’t too hard once you know what to look for. The most common sign is that characteristic swirling or meandering line on the surface of your part. It often looks like a little stream of plastic that solidified before properly merging with the rest of the material. I always tell my team to pay close attention to the area right around the gate. That’s where jetting usually starts because that’s where the plastic first enters the main cavity.
Sometimes, the jetted stream can look a bit different in texture or gloss compared to the surrounding plastic. It might appear shinier, or sometimes duller, depending on the material and how it cooled. You might also see what looks like a faint boundary line where the jetted stream meets the rest of the flow. It’s almost like the plastic didn’t want to mix properly. This boundary can be a real weak spot. I once had a junior engineer mistake early signs of jetting for a flow line. Big difference! Flow lines are more about how the melt fronts meet, but jetting is a distinct, often isolated stream that then gets engulfed. If you flex the part, sometimes it’ll crack right along that jetted pattern. That’s a dead giveaway you’ve got a problem that’s more than skin deep. So, keep your eyes peeled, especially near those gates!
Why Does Jetting Keep Crashing My Molding Party – What’s Causing It?
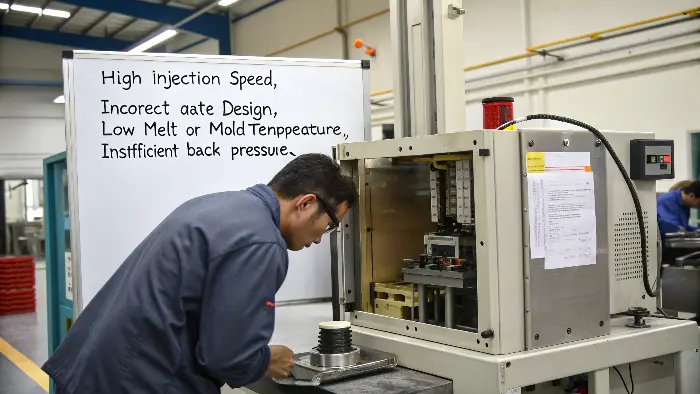
| Frustrated by jetting appearing again and again? Understanding the root causes is the first step to banishing it. So, what’s triggering this annoying defect? Key culprits include too-high injection speed, wrong gate design or location, low melt or mold temperature, or not enough back pressure. These mess up a controlled, uniform fill.  Ah, the million-dollar question: why me? Why this part? Jetting doesn’t just happen for fun; there’s always a reason – or usually a combination of reasons. One of the biggest offenders is injection speed. If you’re pushing that molten plastic into the mold too fast, especially through a small gate, it’s like opening a firehose full blast. The plastic doesn’t have time to spread out and contact the mold walls; it just shoots straight in. I’ve seen this so many times. People crank up the speed to reduce cycle time, but then – oops – jetting appears. Then there’s melt temperature. If your plastic is too cold, it’s thicker, more viscous. It doesn’t flow as easily, and it’s more prone to jetting. Same goes for mold temperature – a cold mold can cause the plastic to freeze off too quickly before it can fill smoothly. And let’s not forget the star of the show: gate design and location. This is huge. If your gate is too small, it acts like a nozzle, accelerating the plastic. If it’s pointing directly into a large open area of the cavity instead of against a wall or a pin, that’s practically an invitation for jetting. I remember a particularly tricky mold where we fought jetting for days. Turned out the gate was just slightly misaligned, pointing into open space. A tiny tweak to aim it at a core pin solved it! It’s often something simple, but you have to look. Here’s a quick rundown of common troublemakers: |
Cause Category | Specific Issues |
|---|---|---|
| Process Parameters | High injection speed/pressure, low melt temperature, low mold temperature, insufficient back pressure | |
| Mold Design | Small gate size, incorrect gate type (e.g., direct sprue into open cavity), poor gate location, restrictive runner design | |
| Material | High viscosity materials (sometimes), improper drying | |
| Machine | Nozzle issues (e.g., too small, cold) |
It’s like being a detective, honestly. You have to look at all the clues.
Okay, I’ve Got Jetting – How Do I Kick It Out For Good?
Jetting found! Now what? Don’t despair, there are solid fixes. Let’s explore how to effectively solve this persistent molding issue and get those parts looking sharp.
To fix jetting, try reducing injection speed, increasing melt/mold temperature, or optimizing the gate design (e.g., using a fan gate or moving it to impinge on a core or wall).

Alright, so you’ve identified jetting. The good news is, it’s usually fixable! The first thing I always try is to play with the injection speed. Slow it down, especially at the very beginning of the fill. Give that plastic a chance to gently enter the cavity and spread out along the mold surface before it takes off. Sometimes, a profiled injection speed – slow at first, then faster – does the trick. This is often the easiest fix to try right at the machine.
If speed isn’t the whole story, look at your temperatures. Increasing the melt temperature makes the plastic flowier. Increasing the mold temperature keeps it molten longer and encourages it to stick to the mold walls instead of jetting across. Be careful not to go too high, though, or you might introduce other problems like degradation or overly long cycle times. It’s a balancing act, for sure.
Now, if process tweaks aren’t enough, you’ve got to look at the mold design, specifically the gate. This is where things can get a bit more involved, but often it’s the most effective long-term solution.
Here are some things I’ve found work:
- Enlarge the gate: A larger gate reduces the velocity of the plastic entering the cavity. Simple, but effective.
- Change gate type: Instead of a pinpoint gate shooting straight in, maybe a fan gate can spread the flow out. Or a tab gate that directs flow along a surface.
- Relocate the gate: This is a big one. Can you move the gate so the plastic hits a wall or a core pin as soon as it enters? This breaks up that jet stream and promotes a more uniform filling pattern. I had this one job, a complex housing, and jetting was a nightmare. We ended up adding a small, almost invisible rib for the gate to impinge on, and boom – problem solved. The client was thrilled! It felt like magic, but it was just good engineering.
Sometimes, even material choice can play a role, though that’s usually a later resort. The key is to be systematic. Change one thing at a time, observe the results. It’s like tuning an instrument; you make small adjustments until it sounds perfect. Or in our case, until the part looks perfect!Conclusion
Identifying and tackling jetting is key. Understanding its causes and fixes means better parts, less waste, and happier clients. Master molding right!
