Struggling to grasp the entire plastic mold making journey? It can seem super complex, risking project delays. This guide breaks it down, making it easy to understand.
The plastic mold manufacturing process involves designing the mold, selecting materials, machining components using CNC and EDM, then assembling, fitting, polishing, and finally testing the mold (T0, T1) until it’s production-ready.
Alright, so you’ve got a new product idea, probably something in plastic, right? And now you’re staring at the mountain that is getting a mold made. It seems like a black box for many, but trust me, once you get the basics, it’s not so scary. I’ve been in this game for a while with CAVITYMOLD, and I’ve seen project managers like Alex from Australia – sharp guy, knows his product design – sometimes get a bit lost in the weeds of mold making. So, let’s pull back the curtain. Stick with me, and by the end of this, you’ll feel way more confident talking about mold manufacturing. You might even start sounding like one of us mold geeks!
So, What Exactly is a Mold in the Manufacturing Process Anyway?
Feeling a bit fuzzy on what a "mold" truly means in the factory setting? It’s a core concept, and getting it wrong can muddle everything downstream. Let’s clear that up!
In manufacturing, a mold is a specially shaped hollow block or cavity into which molten material (like plastic, metal, or glass) is poured or injected to form a specific shape as it cools and hardens.
Diving Deeper into Molds
You know, it’s funny. When I first started, the term "mold" sounded pretty straightforward. But the more you learn, the more you appreciate the sheer engineering that goes into one. It’s not just a random hollow space; it’s a precision instrument. Think of it as the DNA for your plastic part.
What’s Its Main Job?
A mold’s primary job is to repeatedly produce parts that are identical, or at least within very tight tolerances. Imagine trying to make thousands of LEGO bricks without a mold – nightmare, right? Each brick has to be exactly the same to connect properly. That’s the magic of a mold. It gives you:
- Consistency: Every part is a near-perfect replica.
- Speed: Once the mold is made, you can often churn out parts pretty quickly.
- Complexity: Molds can create incredibly intricate shapes that would be super difficult or expensive to make any other way. I’ve seen molds that produce parts with tiny clips, living hinges, and complex internal features – all in one shot!
For folks like Alex, who manage projects for consumer electronics, the mold is critical. The sleek casing of a smartphone, the buttons on a remote, the internal plastic chassis of a device – all these likely come from a mold. If the mold isn’t right, the product isn’t right. And at CAVITYMOLD, we live and breathe that precision because we know our slogan, "Master Molding Right," depends on it. It’s more than just a cavity; it’s the heart of mass production for so many items we use daily.What’s the Difference Between Tooling and Mold Then?
Heard "tooling" and "mold" thrown around and got a bit confused? You’re not alone! They’re related, but not quite the same, and mixing them up can cause headaches.
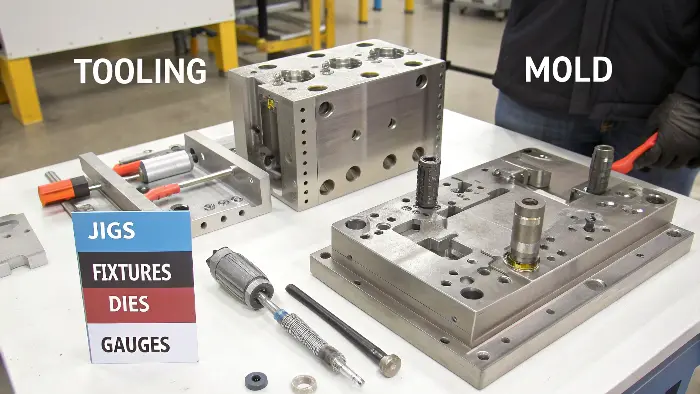
A "mold" is a specific type of "tooling." "Tooling" is a broader term referring to all the custom-made manufacturing aids like jigs, fixtures, dies, gauges, and molds needed to produce a part.

Getting Granular: Tooling vs. Mold
Okay, let’s break this down a bit more because it’s a common point of confusion, even for folks who’ve been around manufacturing for a bit. I remember a client once asking for a "new tooling" when they specifically needed a new injection mold. Semantics, maybe, but in our world, precision in language helps avoid costly mistakes!
Think of it like this:
- Tooling: This is the umbrella term. It’s like saying "vehicles."
- Mold: This is a specific item under that umbrella. It’s like saying "car." A car is a type of vehicle, right? Similarly, a mold is a type of tooling.
Examples of Tooling (Beyond Molds)
So, what else falls under "tooling"?
- Jigs & Fixtures: These hold a workpiece in a specific position during manufacturing or assembly. Imagine a custom clamp that holds a phone casing perfectly still while a robot applies adhesive. That’s a fixture.
- Dies: Used in processes like stamping or extrusion. Think of a cookie cutter, but for sheet metal or for shaping aluminum profiles. That’s a die.
- Cutting Tools: Specialized drill bits, end mills, or lathe tools designed for a particular material or operation.
- Gauges: Custom measuring devices to quickly check if a part meets specifications. A go/no-go gauge, for instance.
So, when we at CAVITYMOLD talk about "mold tooling," we’re referring to the entire set of components that make up the mold assembly itself – the core, the cavity, the ejector pins, the cooling channels, the whole shebang. But if a project manager like Alex mentions needing "new tooling" for his assembly line, he might be talking about a new mold, or he might be talking about a new fixture to hold the molded parts during a secondary operation. Context is king! It’s all about enabling the manufacturing process, and molds are just one, albeit very important, piece of that puzzle.So, What’s the Process of Mold Tooling All About?
Curious about how that hefty piece of "mold tooling" actually comes into being? It’s not just waved into existence with a magic wand, unfortunately! There’s a definite sequence.
Mold tooling process involves designing the tool based on the part, selecting appropriate materials, precisely machining components (like cavities, cores, sliders), and then assembling and testing these components to function as a cohesive unit.

Diving Deeper into Mold Tooling Creation
Creating mold tooling is a bit like an intricate dance between design, engineering, and good old-fashioned craftsmanship. It’s where the rubber meets the road, or rather, where the molten plastic meets the steel! This isn’t just about one part; it’s about creating a system.
Let me try to paint a picture. When we get a request for new mold tooling, say for a complex enclosure for an electronic device Alex is managing, we don’t just jump to cutting metal. Oh no.
Key Phases in Mold Tooling Development:
- Understanding the Requirements (The "Why"):
- What part is it making?
- What material will the part be made from? (This hugely impacts mold design – a mold for ABS plastic is different from one for nylon with glass fiber).
- What are the expected production volumes? (A prototype mold for 1,000 parts is very different from a high-cavitation production mold for millions).
- What are the critical tolerances and surface finish requirements?
This initial stage is all about deep-diving with the client. I’ve learned that asking one extra "why" here can save weeks of rework later.
- Design and Simulation (The "How"):
- This is where our engineers shine, using CAD software to design every facet of the mold. We’re talking about designing the cavity and core, yes, but also the cooling channels (super important for cycle times!), the ejection system (how does the part get out?), sliders and lifters for undercuts, and the runner/gate system (how does plastic get in?).
- We also run mold flow analysis. This simulation software predicts how plastic will flow into the mold, helping us spot potential issues like weld lines, air traps, or warping before we even cut steel. This is a lifesaver, believe me!
- Material Selection for the Tool (The "What With"):
- Tool steels like P20, H13, S136 are common, each with different properties for hardness, corrosion resistance, and polishability. The choice depends on the plastic being molded, the desired mold life, and the part’s finish.
- Manufacturing the Tool Components (The "Making"):
- This involves precision machining like CNC milling, turning, grinding, and often EDM (Electrical Discharge Machining) for intricate details or hard-to-reach areas. This is where CAVITYMOLD’s expertise really comes into play – turning digital designs into physical, high-precision steel components.
- Assembly, Fitting, and Polishing (The "Putting It Together"):
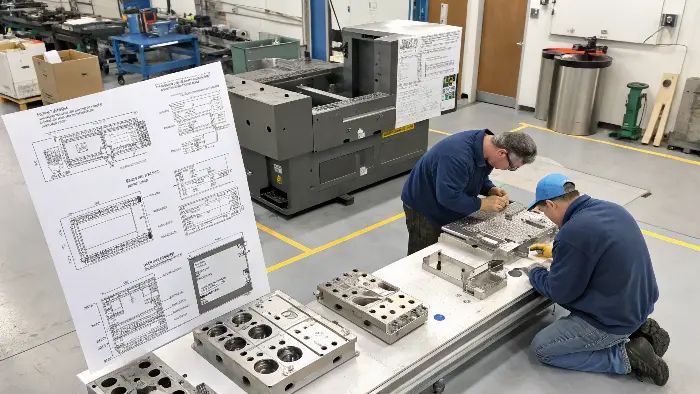
- The machined components are then carefully assembled by skilled toolmakers. This isn’t just bolting things together; it involves meticulous fitting, ensuring everything aligns perfectly. Surfaces that form the part are often polished to a mirror finish if required.
- Testing and Iteration (The "Does It Work?"):
- The assembled mold is put into an injection molding machine for trials (T0, T1, etc.). We shoot plastic, inspect the parts, and make adjustments to the mold until it produces parts that meet all specifications. This can involve tiny tweaks or sometimes more significant modifications.
The whole process requires a symphony of skills. It’s not just about the machines; it’s about the people who can interpret designs, understand materials, and coax perfection from hardened steel. It’s a craft, really.What is the Process of Plastic Mould Manufacturing, Step-by-Step?
Ever wondered how a complex plastic part goes from a mere idea to a tangible object? It’s all down to the plastic mould manufacturing process, a fascinating journey of precision!
- The assembled mold is put into an injection molding machine for trials (T0, T1, etc.). We shoot plastic, inspect the parts, and make adjustments to the mold until it produces parts that meet all specifications. This can involve tiny tweaks or sometimes more significant modifications.
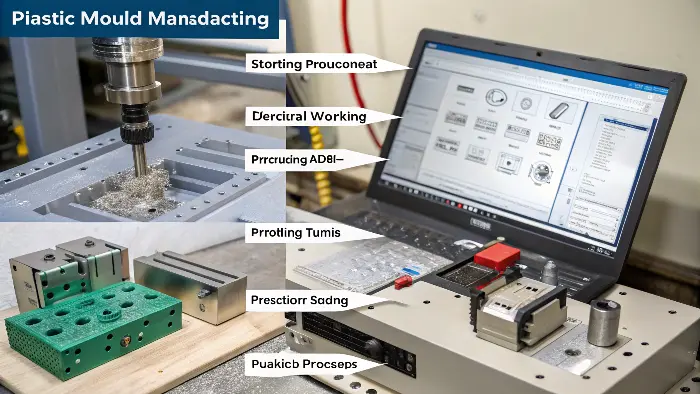
The plastic mould manufacturing process meticulously transforms a digital design into a physical tool. It starts with detailed mold design, then material procurement, followed by CNC machining, EDM, precision finishing (grinding, polishing), assembly, and finally, rigorous testing (T0, T1) to ensure perfect parts.

Let’s Walk Through Plastic Mold Manufacturing – The Nitty-Gritty!
Alright, this is where we really get into the heart of it. If you’re like Alex, managing a product launch, knowing these steps can make your interactions with mold makers like us at CAVITYMOLD so much smoother. It’s a bit like knowing how a chef prepares a gourmet meal – you appreciate the final dish even more! I’ve seen so many projects benefit from the client having a solid grasp of this. Let’s break it down, based on what we do day-in, day-out.
Step 1: Mold Design – The Blueprint of Perfection
This is arguably the most critical phase. A bad design means a bad mold, period.
- Part Analysis: We start with your 3D part design. We’re looking for things like draft angles (so the part can actually come out of the mold!), wall thickness uniformity (to prevent sink marks or warping), and any undercuts that might need special mechanisms like sliders or lifters.
- Mold Structure Design: Based on the part, we design the actual mold. This includes:
- Core & Cavity: The two halves that form the shape of your part.
- Runner System: Channels that guide molten plastic from the machine nozzle to the part cavity. Hot runner or cold runner? That’s a big decision here.
- Gating: The specific point(s) where plastic enters the cavity. The type and location of the gate are crucial for part quality.
- Cooling System: Channels within the mold for water or oil to circulate and cool the plastic. Efficient cooling means faster cycle times and better part consistency. I once saw a project where improving the cooling design shaved 5 seconds off a 30-second cycle time – that’s huge for mass production!
- Ejection System: Pins, sleeves, or plates that push the finished part out of the mold.
- Venting: Tiny channels to let air escape as plastic fills the cavity. Trapped air is a big no-no.
- Mold Flow Analysis: As I mentioned before, we use software to simulate plastic flow. This helps us optimize the design and catch potential problems before any metal is cut. It’s like having a crystal ball for mold making!
Step 2: Material Procurement – Getting the Right Stuff
Once the design is finalized and approved (by you!), we order the steel and other components.
- Tool Steel Selection: We choose the appropriate grade of steel (e.g., P20, H13, NAK80, S136) based on factors like the type of plastic to be molded, the required mold life (number of shots), surface finish requirements, and budget. For example, for a highly corrosive plastic like PVC or for parts needing a mirror finish, we’d opt for a high-grade stainless tool steel like S136.
- Mold Base: Often, a standard mold base is purchased, which provides the foundational structure. Custom components are then fitted into this.
- Other Components: Things like ejector pins, guide pins, bushings, heating elements (for hot runners), etc., are also procured.
Step 3: CNC Machining the Mold – Precision Carving
This is where the digital design starts to take physical shape.
- Rough Machining: High-speed CNC (Computer Numerical Control) milling machines carve out the basic shapes of the core, cavity, and other components from the steel blocks. This removes large amounts of material relatively quickly.
- Finish Machining: More precise CNC machining follows to achieve the final dimensions and finer details. Tolerances here are often in the microns! I’m always amazed watching our machines at CAVITYMOLD execute these complex toolpaths with such accuracy. It’s like sculpturing, but with very, very precise robots.
Step 4: Electrical Discharge Machining (EDM) – Sparking Intricate Details
Some features are too small, too intricate, or in locations that are impossible to reach with conventional cutting tools. That’s where EDM comes in.
- How it Works: EDM uses electrical sparks to erode material. A precisely shaped electrode (often made of copper or graphite) is brought close to the workpiece, and controlled electrical discharges remove tiny bits of steel, creating the desired shape.
- Applications: Perfect for sharp internal corners, complex ribs, fine textures, or deep, narrow slots. It’s slower than CNC milling but can achieve incredible detail. We use it a lot for detailed logos or textured surfaces on parts.
Step 5: The Finishing Touches – Grinding, Fitting, Polishing, Assembly
This is where the artistry of the toolmaker truly shines.
- Precision Grinding: Some surfaces require extremely tight tolerances and smooth finishes, achieved through precision grinding machines.
- Mold Fitting: The various components (core, cavity, sliders, lifters, ejector pins) are meticulously hand-fitted. This ensures smooth operation and prevents flashing (plastic leaking out of seams). It’s like assembling a very complex, very heavy, and very expensive 3D puzzle. There’s a lot of skill in spotting how components need to be finessed to work perfectly. I recall one instance where a tiny adjustment by an experienced toolmaker, almost invisible to the naked eye, solved a persistent sticking issue.
- Polishing: The cavity surfaces that form your part are polished to the required finish. This can range from a standard machine finish to a lens-quality optical polish (SPI A1 or A2). This is often painstaking handwork, especially for complex shapes.
- Assembly: All components, including the mold base, cooling lines, and ejection system, are fully assembled.
Step 6: Mold Trials (T0, T1, Tn…) – The Moment of Truth!
The assembled mold is now ready for its first test drive.
- T0 (First Shots): The mold is mounted in an injection molding machine. We carefully set up the process parameters (temperatures, pressures, speeds) and inject the first plastic shots. These first parts are critically inspected. We’re checking for:
- Short shots: Is the cavity filling completely?
- Flash: Is plastic leaking out?
- Sink marks, warp, voids: Any molding defects?
- Dimensional accuracy: Do the parts meet the specifications?
- Ejection: Does the part come out cleanly?
- Adjustments & Iterations (T1, T2…): Based on the T0 results, adjustments are made to the mold (e.g., tweaking a gate, improving venting, polishing an area) or to the molding process parameters. Then, another trial (T1) is run. This iterative process continues until the mold consistently produces good parts that meet all your requirements. We send you sample parts at each stage for your approval. For a project manager like Alex, getting these sample parts and being able to test them in his assemblies is a crucial feedback loop.
Once you approve the final samples, the mold is production-ready! It might get a final texturing (if required) and then it’s either used for mass production in-house or shipped to your facility. It’s a long road, but when you hold that perfect plastic part, knowing all the work that went into the mold, it’s pretty satisfying. That’s the journey from A to Z, and at CAVITYMOLD, we pride ourselves on mastering every step.Conclusion
So, from design to final testing, plastic mold manufacturing is a detailed, precise journey. Now you’re clued in!
