Struggling to justify the high upfront cost of injection molding to your stakeholders? The initial sticker shock from a tooling quote can halt a project in its tracks, even when you know the per-part price will be incredibly low. Let’s break down exactly where the money goes.
The real cost of injection molding is a balancing act between a high, one-time tooling investment (from $3,000 to over $100,000) and a very low recurring per-part price, often just cents to a few dollars. This balance makes it the best choice for high-volume production. Your total project cost will hinge on the tool’s complexity and your total production quantity.
Understanding this trade-off is the first step. The big tooling bill pays for itself over thousands or millions of parts. But to make a smart decision, you need to know what drives each side of the cost equation. I’ve managed hundreds of molding projects over the years, and I’ve seen how easy it is to miscalculate if you don’t look at the details. We’re going to dive into the specifics so you can budget accurately and confidently for your next project.
Why is injection molding tooling so expensive?
Have you ever received a mold tooling quote and wondered why it costs more than a new car? It’s a huge investment, and trying to explain it to your finance department without a clear breakdown is a tough conversation. Let’s demystify that price tag by looking at what really goes into making a high-precision production tool.
Injection molding tooling is expensive because it requires high-precision machining, extremely durable materials like hardened steel, and a complex design. The process involves many hours of skilled labor from engineers and toolmakers who use advanced machines like CNC and EDM, followed by careful hand-finishing. This is all necessary to create a robust tool that can produce millions of identical parts within very tight tolerances.
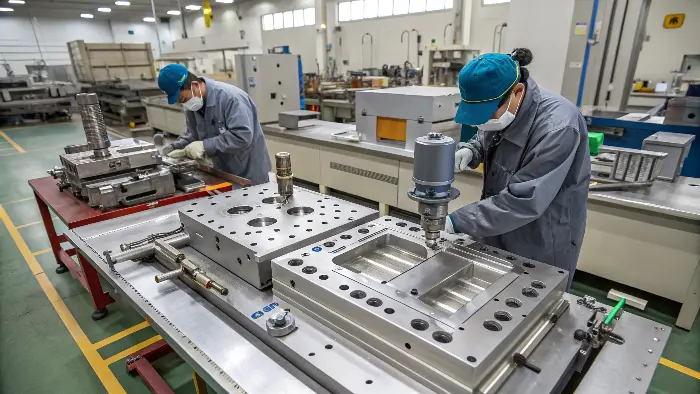
The price of a mold isn’t arbitrary. It’s a direct reflection of the materials, machinery, and skilled human hours required to transform a block of steel into a flawless production asset. I remember a project for a medical device company where the part had intricate internal channels and a high-gloss surface finish. The mold took over 800 hours to build. The cost was significant, but that tool is still running perfectly today, having produced over two million parts without a single issue. Let’s explore the key cost drivers in more detail.
The Role of Material Selection
The first factor is the steel itself. You can’t just use any metal. For low-volume runs or prototypes (under 10,000 parts), we might use a softer P20 steel or even high-grade aluminum to keep costs down. But for a production tool expected to last for a million cycles, you need hardened tool steel like H13 or S7. These materials are much harder to machine, which means more tool wear and longer machining times on our equipment. They also require specialized heat treatment processes to achieve the right hardness and durability. This material choice alone can change the price by thousands of dollars, but it’s essential for ensuring the mold’s longevity.
Intricacy of Design and Machining
This is the biggest variable. A simple, open-and-shut mold for a flat lid is one thing. A complex mold for a component with threads, clips, and undercuts is entirely different. Features like undercuts require side-actions, which are moving parts within the mold (like slides and lifters) that have to be perfectly timed and integrated. Each of these mechanisms adds complexity, design time, and machining hours. We use 5-axis CNC machines for the main shaping and then turn to Electrical Discharge Machining (EDM) to create sharp internal corners or detailed textures that a normal cutting tool can’t reach. The more complex the part geometry, the more machine setups and hours are needed.
Labor, Expertise, and Finishing
A common misconception is that building a mold is a fully automated process. The reality is that it relies heavily on the hands-on expertise of skilled toolmakers. After the CNC and EDM machines do their part, our team spends dozens of hours hand-polishing the cavities to achieve the specified surface finish. A mirror-like, A-1 diamond polish can take a single person over a week to complete for a moderately complex mold. This manual labor is expensive but absolutely critical for part quality, especially for clear lenses or high-end consumer products. From the initial design-for-manufacturing (DFM) analysis to the final assembly and testing, it’s the skill of the people involved that truly determines the quality and cost of the tool.
What is the most important consideration when estimating the cost of injection molding tooling?
You’re trying to budget for a new project, but the tooling cost feels like a complete black box. Guessing wrong on this number can blow your entire budget and push your timeline off a cliff. To avoid this, you need to focus on the one factor that has the biggest impact on price.
The most important consideration when estimating tooling cost is part complexity. This single factor encompasses the part’s size, its core geometry, surface finish requirements, and the presence of advanced features like undercuts or threads. Every layer of complexity adds machining time, requires specialized mechanisms like slides or lifters, and demands more skilled labor, which directly drives up the mold’s price.
At CavityMold, the first thing we do when we receive a new RFQ is a detailed DFM analysis, and most of that time is spent breaking down the part’s complexity. A simple change, like increasing a draft angle or eliminating an unnecessary undercut, can sometimes save a client over 20% on their tooling cost without affecting the part’s function. Focusing on part complexity first will give you the most accurate estimate and the best opportunity to reduce costs.
Analyzing Part Geometry and Size
The overall size of the part dictates the size of the mold base and the amount of steel required, which is a foundational cost. But beyond size, the geometry is key. Does the part have deep, thin ribs? These are difficult to machine and can cause issues with ejection and cooling. Are there areas with very tight tolerances? Holding a tolerance of +/- 0.02mm requires much slower, more precise machining and more rigorous quality control than a standard commercial tolerance of +/- 0.1mm. Every geometric constraint that deviates from a simple, open-and-shut design adds hours to the programming and machining schedule.
The Impact of Undercuts and Side-Actions
Undercuts are features that prevent a part from being ejected directly from the mold cavity, like a snap-fit clip or a horizontal hole. These are the single biggest drivers of complexity. To create an undercut, the mold needs a side-action, which is a moving component like a slide or a lifter that pulls away before the part is ejected. These mechanisms need to be perfectly designed, machined, and fitted into the mold. They add significant cost due to the extra components, precision assembly, and increased design time. In my experience, each undercut can add anywhere from $1,500 to $10,000 to a tool, depending on its size and complexity.
Surface Finish and Material Requirements
The required surface finish has a direct impact on labor costs. A standard, non-cosmetic part might only need a basic machine finish (SPI-C1). However, a high-end consumer product may demand a high-gloss, mirror-like polish (SPI-A2) or a specific texture. These finishes are achieved through hours of manual polishing and bead blasting. The more pristine the finish, the more labor is required.
Here’s a simple table to show how these factors influence the cost:
| Feature Factor | Low Cost Impact | High Cost Impact |
|---|---|---|
| Part Complexity | Simple, open-and-shut design | Multiple undercuts, threads, text |
| Tolerances | Standard commercial (+/- 0.1mm) | High-precision (+/- 0.02mm) |
| Surface Finish | Standard machine finish (SPI-C1) | High-gloss diamond polish (SPI-A2) |
| Required Volume | < 10,000 parts (uses P20 Steel) | 1,000,000+ parts (uses Hardened H13) |
| Cavitation | Single-cavity | Multi-cavity (8, 16, 32+) |
How much does injection molding cost per part?
You’ve approved the expensive tool, so the individual parts should be cheap, right? For the most part, yes, but several factors can still influence that final per-part price. Understanding these variables is key to protecting your profit margin and ensuring your project stays on budget over its entire lifecycle.
The per-part cost for injection molding typically ranges from a few cents to a few dollars. This final price is determined by three main drivers: the cost of the raw plastic resin, the machine’s cycle time (the time it takes to make one part), and the total production volume, which spreads out setup and labor costs.
I once worked with a client who was focused solely on getting the lowest possible material price. However, their part design had some very thick sections, which led to a long cycle time. We proposed a small design change to thin out the walls. This slightly increased the tool cost but shaved 8 seconds off the cycle time. Over their 500,000-part run, this small change saved them over $40,000 in machine time, far outweighing the material savings they were initially chasing. It’s a perfect example of how the three main factors work together.
Deconstructing the Cycle Time
Cycle time is the total time it takes for the molding machine to complete one full cycle: closing the mold, injecting the plastic, holding pressure, cooling the part, opening the mold, and ejecting the part. Of all these steps, cooling time is almost always the longest and has the biggest impact on cost. The thicker your part’s walls, the longer it takes for the part to cool and solidify enough to be ejected without warping. A shorter cycle time means more parts can be produced per hour, which lowers the cost of machine time allocated to each part. This is why we spend so much time on DFM, looking for ways to optimize wall thickness and cooling channel design.
The Role of Material Choice and Additives
The type of plastic resin you choose has a direct and obvious impact on the part price. Commodity plastics like Polypropylene (PP) or Polyethylene (PE) are very inexpensive, often costing less than $2.00 per kilogram. However, high-performance engineering plastics like PEEK or Ultem can cost over $50.00 per kilogram. The cost of your part is directly tied to its weight and the price of the chosen resin. Beyond the base resin, costs can also be added by colorants, UV inhibitors, flame retardants, or other additives that are mixed in to meet your product’s specific requirements.
Labor, Overhead, and the Power of Volume
While modern injection molding is highly automated, it is not "lights out." A machine operator is still needed for setup, quality control checks, packaging, and troubleshooting. These labor costs are part of the machine’s hourly rate. That hourly rate also includes overhead: the cost of electricity (molding machines use a lot!), facility maintenance, and the amortization of the machine itself. A smaller, 100-ton press might have an hourly rate of $50, while a massive 1500-ton press could be $250 per hour. Finally, volume is king. A one-time setup charge of $400 might seem high, but when spread over a 100,000-part run, it adds less than half a cent to each part. For a 1,000-part run, it adds a significant $0.40 per part. Higher volumes always lead to a lower per-part cost.
How much does injection molding cost per kg?
When you’re trying to create a quick, back-of-the-napkin estimate for your part, using a "cost per kilogram" metric can be tempting. It seems simple. But this number is often misleading if you don’t understand the full picture of what it represents. It’s not just about the price of plastic pellets.
The cost per kilogram for injection molding is a combined figure that includes both the raw material price (e.g., $1.50/kg for PP, $25/kg for PEEK) and the machine’s operational cost. A more useful calculation is the total cost (material + machine time) divided by the total weight of parts produced in that time. This shows that the final "cost per kg" of finished parts is always much higher than the raw material cost.
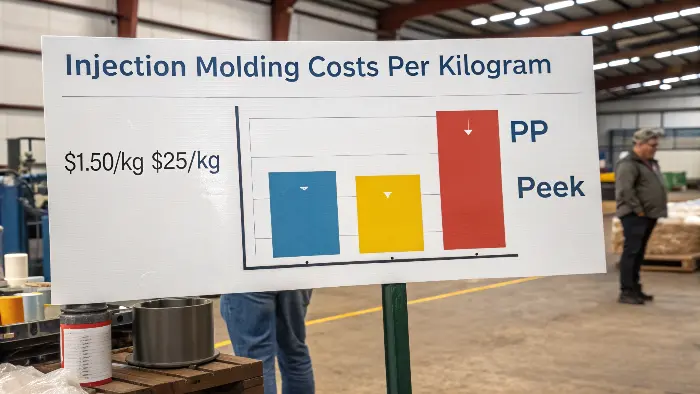
Thinking in terms of "cost per kg" can be a dangerous oversimplification. I’ve seen project managers get into trouble by using the raw material price to estimate their budget. They see ABS listed at $3.00/kg and assume that’s their cost. They forget to account for the machine time, which is usually the larger portion of the per-part price. Let’s break down how to calculate it correctly.
Raw Material Price vs. Finished Part Price
The first thing to understand is the massive difference between the price you pay for a bag of plastic resin and the final cost of your molded parts when measured by weight. The raw material is just one input. The process of melting it, injecting it, cooling it, and handling it adds significant value and cost. A light, complex part with a long cycle time can easily have a higher per-part cost than a heavy, simple part with a short cycle time, even if the heavy part uses five times more material. You are not just buying plastic; you are buying a manufacturing process.
Calculating the True Cost Per Kg
Let’s walk through a realistic example.
- Machine Rate: Our 250-ton press has an operating cost of $60/hour.
- Material: We’re using ABS, which costs $3.00/kg.
- Part Details: The part weighs 50 grams (0.05 kg).
- Cycle Time: The cycle time is 30 seconds, which means we can produce 120 parts per hour.
Now, let’s calculate the costs for one hour of production:
- Material Consumed per Hour: 120 parts/hour × 0.05 kg/part = 6 kg of ABS.
- Material Cost per Hour: 6 kg × $3.00/kg = $18.00.
- Machine Cost per Hour: This is our fixed rate of $60.00.
- Total Cost per Hour: $18.00 (Material) + $60.00 (Machine) = $78.00.
- Cost per Part: $78.00 / 120 parts = $0.65 per part.
Now for the final step. What is the true cost per kg of the finished parts?
True Cost per kg: $78.00 (Total Hourly Cost) / 6 kg (Material Used) = $13.00/kg.
As you can see, the finished part cost is $13.00 per kilogram, more than four times the raw material cost of $3.00 per kilogram. This difference is the cost of manufacturing.
Why You Should Focus on Cost Per Part
Because of this dynamic, I always advise my clients to focus on the cost per part, not the cost per kilogram. The cost per part is the number that directly impacts your bottom line and product profitability. While the cost per kg is an interesting background calculation, it can be easily skewed by cycle time and machine rates. A project manager who understands the drivers of cycle time, material choice, and machine overhead will always create a more accurate and reliable budget.
Conclusion
Ultimately, the cost of injection molding is a story of two numbers: a high, one-time investment in tooling and a very low, recurring cost per part. Your success hinges on understanding the factors that drive both, especially part complexity and production volume. Mastering this balance is key to success.
