Seeing those ugly jetting marks on your parts? It’s a common headache, leading to weak, unsightly products. But what if the gate design itself holds the key to smooth, perfect fills?
Yes, optimizing gate design is a primary solution to eliminate jetting. By carefully selecting gate type, size, and location to control melt flow into the cavity, you prevent the free-stream jetting that causes defects. It’s about guiding the plastic, not letting it spray in!
I’ve seen my fair share of molding headaches in my years with CavityMOLD, and jetting – ugh, jetting is one of those defects that just makes you sigh. You open the mold, and there it is: that worm-like, snaking pattern on the part surface. It’s not just ugly; it means the part is likely weak and could fail. For project managers like Alex, who are under pressure to deliver high-quality components for consumer electronics, defects like jetting are absolute showstoppers. It means delays, rejections, and added costs. The good news? A lot of the time, the culprit – and the solution – lies in something we can control very precisely: the gate design. So, let’s dive into how we tackle this pesky problem.
How Can We Actually Reduce That Nasty Jetting in Injection Molding?
Tired of seeing those snake-like jetting marks ruin your parts? It’s a common frustration. What practical steps can you take to stop jetting in its tracks?
Reduce jetting by optimizing gate design (type, location, size), slowing injection speed initially, and ensuring the melt impinges on a mold wall or pin immediately. Proper venting also helps.
Okay, let’s get down to brass tacks on jetting. When that molten plastic shoots into the mold cavity like water out of a high-pressure hose, uncontrolled, that’s jetting. It doesn’t get a chance to create a nice, smooth flow front by clinging to the mold walls. Instead, it squiggles around, cools prematurely, and then the rest of the plastic has to flow around this mess, leading to terrible weld lines and structural weaknesses. It’s a disaster.
So, how do we at CavityMOLD stop this? It’s all about controlling that initial entry of plastic. My first go-to is always the gate design and location. This is so critical.
Here are some of the strategies we use, drawing from those insights you shared:
- Gate Type:
- Overlap Gate: This is a clever one. The gate overlaps onto a mold surface, forcing the plastic to spread out immediately along the wall instead of shooting into open space. I’ve seen this work wonders.
- Fan Gate or Tab Gate: These are your friends for wider parts. They spread the melt front out gradually, kind of like a river delta, reducing that focused, high-velocity stream. This helps achieve a more uniform flow and really cuts down on shear stress, which can also degrade the material. I often suggest these for parts where cosmetic appearance is key.
- Gate Location: This is pure strategy. We want the plastic, as it exits the gate, to hit an obstruction almost immediately – like a core pin, a rib, or the opposite cavity wall. This "breaks" the jet and forces the plastic to start filling the cavity more like a gentle wave. We try to avoid gating directly into large, open sections where the plastic has nowhere to go but straight ahead.
- Gate Size and Shape:
- Larger Gate: Sometimes, a slightly larger gate can reduce the velocity of the plastic, like using a wider nozzle on a hose. But it’s a balance – too big and you have issues with gate removal or longer cycle times.
- Shorter, Wider Gates: As mentioned in the insights, these can promote a smoother, more controlled flow. The aspect ratio matters.
- Fan-shaped or Bevelled Gates: These shapes help the melt transition more smoothly from the runner into the cavity, dispersing the flow.
Beyond the gate itself, we also look at runner design. We need smooth transitions and adequately sized runners to ensure the plastic arrives at the gate in good condition, without excessive pressure loss or shear heating. And, of course, mold flow analysis software (like Moldflow) is our crystal ball. Before we even cut steel, we simulate the filling process. This allows us to test different gate designs and locations virtually, predicting where jetting might occur and making adjustments proactively. It’s a massive time and cost saver. Alex, our project manager friend, really appreciates this because it de-risks the project upfront. It’s all part of our commitment to "Master Molding Right."How Do We Get Rid of Those Annoying Flow Lines in Injection Molding?
Seeing faint lines or patterns on your part surface? These flow lines can spoil aesthetics and indicate fill issues. What’s the secret to a smooth, flawless finish?
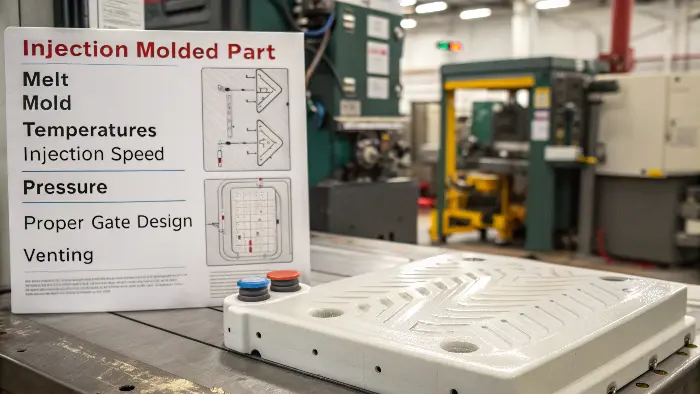
Eliminate flow lines by optimizing melt and mold temperatures, adjusting injection speed and pressure for a uniform fill, and ensuring proper gate design and venting. Consistent material viscosity is also key.

Flow lines – sometimes they look like rings around a gate, sometimes like subtle variations in gloss, or even "record grooves." They’re different from jetting, though jetting can certainly cause some horrific flow-related marks! Flow lines are more about how the layers of plastic flow and cool as they fill the mold. If different sections of the melt front cool at different rates, or if there’s hesitation in the flow, you’ll see it on the surface. For products where appearance is everything, like some of the consumer electronics components Alex deals with, flow lines are a no-go.
So, what’s in our CavityMOLD toolkit for tackling these?
First, temperature control is huge. Both melt temperature and mold temperature. If the melt is too cold, it’s sluggish and won’t flow smoothly. If the mold is too cold, the plastic freezes off too quickly as it touches the walls, leading to those distinct flow patterns. We aim for a Goldilocks zone – just right.
Next up is injection speed and pressure. Sometimes, if the injection speed is too slow, the plastic cools too much before the cavity is full, exacerbating flow lines. Other times, especially with certain materials or complex geometries, a very fast injection can cause turbulence and its own set of flow issues. It’s about finding that optimal fill rate for a smooth, progressive fill. Packing pressure and time also play a role in ensuring the part is fully densified and replicates the mold surface accurately after the initial fill.
Gate design and location are important here too, not just for jetting. A gate that’s too small can cause high shear, which can affect the material’s viscosity and flow behavior. A poorly placed gate might cause the plastic to take a tortuous path, leading to race-tracking (where plastic flows faster in thicker sections) and differential cooling. We always consider how the plastic will flow from the gate to fill the entire part. The goal is a balanced flow front.
Venting! Trapped air is a major enemy of smooth surfaces. If air can’t escape as the plastic flows in, it gets compressed, heats up, and can cause burn marks or prevent the plastic from filling properly, leading to flow lines or short shots. We ensure our molds have adequate vents in the right places.
And let’s not forget the material itself. Inconsistent material (e.g., regrind mixed poorly with virgin material) or material that hasn’t been dried properly can lead to viscosity variations and flow problems. We’re pretty strict about material handling.
It’s a combination of factors, really. I often tell my team it’s like conducting an orchestra – every instrument (parameter) needs to be in tune and playing its part correctly to get that beautiful, smooth surface.What Exactly Do We Mean by "Optimization of the Injection Molding Process"?
You hear "process optimization" a lot, but what does it really involve for injection molding? Is it just tweaking machine settings, or is there more to it?
Optimization of the injection molding process involves systematically adjusting all relevant variables—material, mold design (including gates), and machine parameters (temperature, pressure, speed, time)—to achieve consistent, high-quality parts efficiently and cost-effectively.

When we at CavityMOLD talk about optimization of the injection molding process, we’re looking at the whole shebang, not just fiddling with a few dials on the molding machine. It’s a holistic approach aimed at getting the best possible parts, consistently, in the shortest cycle time, with the least waste. It’s about making the entire system work together harmoniously. For someone like Alex, this means his parts are made right the first time, every time, and on schedule.
So, what are the key pillars of this optimization?- Material Selection and Preparation: It starts here. Is it the right plastic for the application? Is it dried properly to the manufacturer’s specs? Any variations here can throw everything else off. We always verify this.
- Mold Design and Construction: This is huge, and it’s where gate design optimization fits in. A perfectly optimized machine process can’t fully compensate for a poorly designed mold. We look at:
- Gate Design: As we’ve discussed, crucial for preventing defects like jetting and managing flow.
- Runner System: Is it balanced? Does it minimize pressure drop and material waste?
- Cooling System: Probably one of the most critical aspects for cycle time and part quality (warpage, dimensions). Is it efficient? Does it cool the part uniformly? We use advanced cooling techniques.
- Venting: Essential for letting air escape, preventing burns and short shots.
- Ejection System: Does it eject the part without causing distortion or marks?
- Machine Parameters: This is what most people think of – the settings on the injection molding machine. We use a systematic approach, often Design of Experiments (DOE), to find the sweet spot for:
- Temperatures: Barrel temps, nozzle temp, mold temp.
- Pressures: Injection pressure, holding pressure, back pressure.
- Speeds: Injection speed, screw recovery speed.
- Times: Injection time, holding time, cooling time.
- Shot Size & Cushion: Ensuring the right amount of material is injected.
We use advanced design and testing tools, like CAD for mold design and mold flow analysis software to simulate and refine things before we even cut steel. This virtual testing is a game-changer for process optimization because it allows us to identify and solve potential problems early. Then, once the mold is built, we conduct rigorous trials, monitoring key process variables and part quality to fine-tune everything. It’s an iterative process of refinement. Optimization isn’t a one-time thing; it’s about continuous improvement. We’re always looking for ways to make things better, faster, and more cost-effective for our clients.What’s the Deal with "Gate Freeze" in Injection Molding, and Why Should I Care?
Heard the term "gate freeze" but not sure what it means or why it’s important? It’s a critical moment in the molding cycle that impacts your part quality significantly.
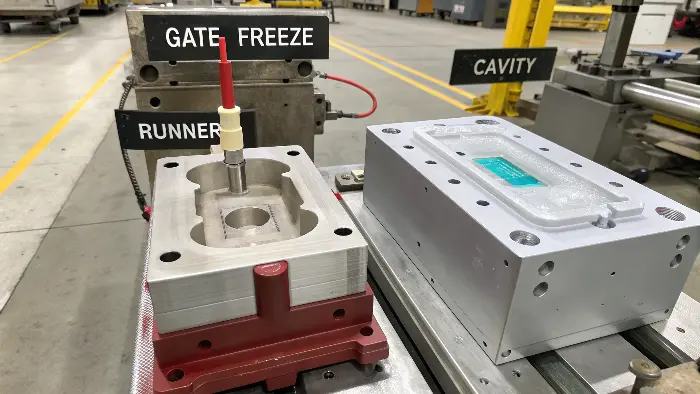
Gate freeze is the point when the plastic in the gate solidifies, effectively sealing off the cavity from the runner. It’s crucial because it determines when packing pressure can no longer affect the part, impacting final dimensions and preventing backflow.

Gate freeze – it sounds dramatic, doesn’t it? But it’s a really critical moment in the injection molding cycle. Think of the gate as the doorway for the molten plastic entering the mold cavity. During the injection and packing phases, we’re pushing plastic through this doorway. Gate freeze (or gate seal) is the exact moment when the plastic in that narrow gate section cools down enough to solidify. Once that happens, the doorway is effectively closed. No more plastic can get in, and – just as importantly – no more plastic can get out from the cavity back into the runner.
Why should you, or someone like Alex managing a project, care about this? Well, it has a huge impact on the final part.- Packing the Part: The packing or holding phase of injection molding is when we apply pressure to compensate for shrinkage as the plastic cools and solidifies in the cavity. This pressure is effective only as long as the gate is open (not frozen). Once the gate freezes, the cavity is isolated. So, the gate freeze time dictates how long we can effectively pack out the part. If the gate freezes too early, before the part is adequately packed, you can end up with sink marks, voids, and dimensional inconsistencies. I’ve seen parts that looked okay on the outside but were full of internal voids because of premature gate freeze.
- Dimensional Stability: Consistent gate freeze time from shot to shot is essential for consistent part weight and dimensions. If it varies, the amount of packing will vary, and so will your parts. This is super important for tight tolerance components.
- Preventing Backflow: Once the gate is frozen, it acts like a check valve, preventing the still-molten plastic in the cavity (which might be under pressure from its own shrinkage or residual packing pressure) from oozing back out into the runner. If this happened, it would lead to under-packed parts and inconsistencies.
The design of the gate – its size (especially its thickness) and the temperature of the mold around the gate area – are the main factors controlling how quickly it freezes. We design gates carefully to ensure they freeze off at the right moment, typically after the main part of the cavity has solidified enough to retain its shape but before we want to start screw recovery for the next shot. It’s a precise balancing act, and getting it right is key to making good, consistent parts. It’s one of those details that, if overlooked, can cause a world of problems downstream.Conclusion
Optimizing gate design is fundamental to preventing jetting and ensuring high-quality parts. CavityMOLD’s expertise ensures your complex molding challenges are met with precision and efficiency.
