Struggling with parts that get stuck, show ugly drag marks, or break during ejection? These issues often stem from poor design for manufacturability, costing time and money. It’s frustrating when a great design fails in production because of a few overlooked details.
The key is designing with the manufacturing process in mind, especially for injection molding. This means focusing on critical features like draft angles, uniform wall thickness, and proper texturing. Getting these right ensures parts eject smoothly, look professional, and are produced efficiently, saving you from costly rework and delays.
Thinking about these details early in the design stage is the difference between a successful product launch and a production nightmare. I’ve seen countless projects, and the ones that go smoothly are always the ones where the designer and mold maker collaborate on these fundamentals from day one. It’s not just about making a part; it’s about making a part well, over and over again. Let’s break down the most important considerations you need to master.
Why is draft angle so important in injection molding?
Ever designed a part that looked perfect on screen but was impossible to produce? The part gets stuck in the mold, causing scratches and stress marks. This not only ruins the part’s appearance but also slows down your entire production line, creating frustrating delays and increasing costs.
A draft angle is a slight taper applied to the vertical walls of a part. Its primary job is to make it easier to push the part out of the mold after it has cooled. This simple feature prevents the part from dragging against the mold surface, which avoids cosmetic defects, reduces stress on the part, and prevents damage to the mold itself.
I remember a project with a client, Alex from Australia, who was designing a sleek new casing for a consumer electronic device. His initial design had perfectly vertical, 90-degree walls for a minimalist look. In the review, I pointed out that without draft, the textured finish he wanted would get scraped off during ejection. Even worse, the ejector pins would likely punch through the thin plastic or cause ugly stress marks because of the friction. It took some convincing, but once he saw the risk, he understood. Adding just a 1.5-degree draft was a small change that made a huge difference. The final parts came out clean every time, production ran smoothly, and his product launched without a hitch. This is why we always say draft isn’t just a suggestion; it’s a fundamental requirement for good part design. It’s about more than just getting the part out; it’s about getting it out perfectly, cycle after cycle.
Preventing Cosmetic Defects
When a part has no draft, its vertical walls rub against the mold steel during ejection. This friction creates long, unsightly scratches called "drag marks" or "scuff marks." This is especially a problem for parts with textured or polished surfaces. The texture you carefully specified can be completely ruined.
-
Friction and Adhesion: As the plastic cools, it shrinks and grips the mold core tightly. The ejection force has to overcome this friction. A draft angle reduces the contact surface area as the part begins to move, dramatically lowering the required force.
-
Surface Finish Preservation: A smooth or textured finish is an important part of a product’s look and feel. Draft ensures that the finish molded into the part is preserved, not scraped away.
Reducing Mold Wear and Cycle Times
A mold is a significant investment. Parts without proper draft put tremendous stress on the mold during every cycle.
-
Stress on Ejector System: The ejector pins have to push harder to get the part out. This can lead to wear on the pins, the pin plates, and the mold surfaces they interact with. In extreme cases, parts can get so stuck that they require manual removal, which halts production entirely.
-
Faster Production: With proper draft, parts release cleanly and quickly. This allows for shorter cycle times. A reduction of even one or two seconds per cycle adds up to thousands of more parts and significant cost savings over a long production run.
Ensuring Part Integrity
The force needed to eject a part with no draft can be strong enough to damage the part itself.
- Stress Marks: Ejector pins can leave white, circular marks on the part’s surface, known as stress marks.
- Deformation: The part might bend or warp as it’s being pushed out unevenly.
- Breakage: In the worst-case scenario, the part might crack or break, especially if it has thin features.
Adding a draft angle is one of the simplest ways to design for manufacturability and avoid all these problems.
How do you determine the right draft angle?
Choosing a draft angle can feel like a guessing game. Do you go with a standard 1 degree and hope for the best? If you pick an angle that’s too small, you still risk ejection issues. If you make it too large, it might alter the part’s fit and function.
The right draft angle depends on several factors: the part’s depth, the required surface finish, the material, and the mold’s ejection mechanism. A good starting point is 1 to 2 degrees for most applications. For textured surfaces, you need to add approximately 1.5 degrees for every 0.001 inch (0.025mm) of texture depth.
Determining the perfect draft angle is a balancing act. It’s part science, part experience. We often begin by looking at the "line of draw," which is the direction the part will be ejected from the mold. All drafted surfaces must be angled in this direction. For simple parts, this is straightforward. For complex geometries with sliders or lifters, it gets more complicated as you might have multiple lines of draw to consider. I always recommend discussing this with your mold maker. We use CAD tools to simulate the ejection and can quickly see if a chosen angle is sufficient. It’s much easier to adjust a 3D model than to modify a hardened steel mold. Thinking about these factors systematically will help you specify a draft that ensures both manufacturability and part quality.
Key Factors for Determining Draft Angle
To move from a guess to an informed decision, you need to consider a few key variables. Each one influences the minimum draft required for a clean release. Let’s break them down.
| Factor | Influence on Draft Angle | Reason |
|---|---|---|
| Draw Depth | Deeper parts need more draft. | The longer the surface that has to slide along the mold, the more total friction is generated. A larger angle helps it break free earlier. |
| Surface Finish | Textured surfaces need significantly more draft. | The tiny peaks and valleys of a texture act like undercuts, creating mechanical locks that resist ejection. More draft is needed to clear them. |
| Material Type | Softer, more flexible materials can use less draft. | Materials like TPE can stretch and deform slightly during ejection, making them more forgiving. Rigid materials like glass-filled nylon have no give and require sufficient draft. |
| Shrink Rate | High-shrink materials grip the core tighter. | As the plastic shrinks, it tightens around the male side (core) of the mold. A higher shrink rate means a tighter grip, which requires more draft to overcome. |
A Practical Rule for Textured Surfaces
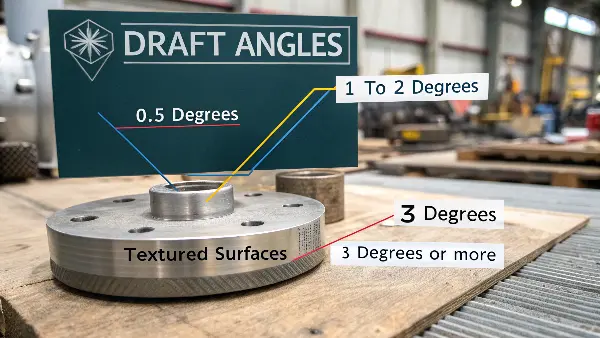
Surface finish is often the biggest driver for increasing draft. A simple polished surface might release with just 0.5 degrees, but as soon as you add texture, that number goes way up. The industry-standard rule of thumb I mentioned earlier is a great starting point:
Base Draft (e.g., 1°) + 1.5° for every 0.001" of Texture Depth
For example, if you are using a standard light texture like MT-11010, which has a depth of about 0.001", you would need:
1° (base) + 1.5° = 2.5° minimum draft.
For a heavier texture like a leather grain with a depth of 0.003", you would need:
1° (base) + (1.5° x 3) = 5.5° minimum draft.
Ignoring this rule is one of the most common causes of part rejection for cosmetic reasons.
What is the minimum angle for a draft angle?
Designers often ask me for one simple number: "What’s the absolute minimum draft I can get away with?" They are trying to preserve a specific design aesthetic with very straight walls. The problem is, pushing the minimums too far can lead to a production disaster.
While it’s technically possible to have 0.5 degrees of draft for shallow, highly polished parts made from certain materials, a safer and more universal minimum for general purpose applications is 1 to 2 degrees. For any textured surface, the minimum increases significantly and is dictated by the depth of the texture, often requiring 3 degrees or more.
Thinking in terms of absolute minimums can be risky. It’s better to think about the optimal draft angle. I had a client designing a small connector where the side walls needed to be as parallel as possible for a snap-fit. They insisted on 0.5 degrees. The part was deep and made of a rigid polycarbonate. During the first trial, about 30% of the parts showed heavy drag marks, and a few even cracked. We had to weld material back into the mold and re-machine it with a 1.5-degree draft. The extra degree was barely noticeable visually, but it completely solved the production problem. The lesson here is that a slightly more generous draft is cheap insurance against major production headaches. Always start with a safe standard and only reduce it if absolutely necessary and after a thorough design review.
When Can You Use Very Low Draft Angles (0.5 to 1 degree)?
Pushing the limits on draft is possible, but only under a specific set of ideal conditions. You can only consider going below 1 degree if all the following are true:
- Shallow Draw Depth: The vertical wall is very short, typically less than half an inch (or 12mm). The shorter the travel distance during ejection, the less friction there is to overcome.
- Highly Polished Surface: The mold surface must be polished to a mirror finish (SPI-A1 or A2). Any imperfection or roughness will increase friction and prevent a clean release. This means no textured surfaces.
- Low-Friction & Flexible Material: Materials like Polypropylene (PP) or certain TPEs are more forgiving. They have a lower coefficient of friction and can flex slightly during ejection without showing stress. Rigid, high-shrink materials like ABS or Polycarbonate are poor candidates for low draft.
- Robust Ejection System: The design must allow for large, well-supported ejector pins placed in non-cosmetic areas to distribute the ejection force evenly.
Why 1 to 2 Degrees is the "Golden Rule"
For the vast majority of parts, a draft of 1 to 2 degrees is the sweet spot. We recommend it as a standard at CAVITYMOLD for several reasons:
- It provides a wide margin of safety. This angle is enough to overcome the friction from minor variations in material batches, processing temperatures, and mold wear over time.
- It accommodates most materials and finishes. It works well for common materials like ABS, PC, and Nylon with light polishes (SPI-B or C-grade finishes).
- It’s usually visually acceptable. For most products, a 1-degree taper is not noticeable to the end-user but makes a world of difference in manufacturing.
Here’s a simple table to use as a quick reference:
| Condition | General Guideline for Minimum Draft |
|---|---|
| Shallow Part (<0.5"), Polished Finish | 0.5° – 1° |
| General Purpose (Most Parts) | 1° – 2° |
| Deep Part (>2"), Polished Finish | 3°+ |
| Light Texture (e.g., MT-11010) | 2.5° – 3° |
| Heavy Texture (e.g., Leather Grain) | 5°+ |
Ultimately, the minimum draft isn’t a single number. It’s a calculated risk based on your specific design. My advice is always to err on the side of caution. An extra half-degree of draft is rarely a problem, but half a degree too little can stop your project in its tracks.
What is the most important rule for wall thickness in plastic parts?
You’ve perfected the draft angles, but now your parts are coming out with ugly sink marks, warped shapes, and internal voids. These defects are almost always caused by issues with wall thickness, another critical aspect of design for manufacturability that is often overlooked.
The single most important rule for wall thickness is to keep it as uniform as possible throughout the entire part. When wall thickness varies, the thinner sections cool and solidify faster than the thicker sections. This differential cooling creates internal stresses that lead to sink marks, voids, and warpage.
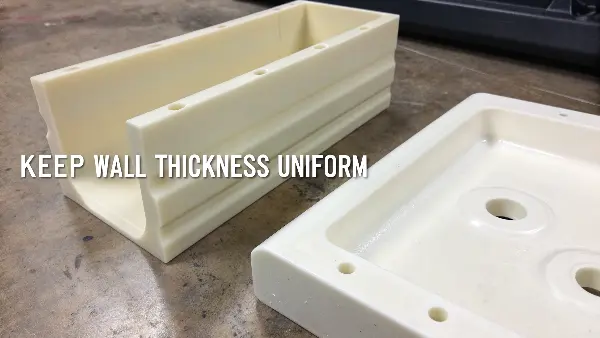
Think of it this way: plastic shrinks as it cools. If one area is still molten while another is already solid, the molten area will continue to shrink and pull material away from the solidified sections. This "pulling" action is what causes defects. For example, a thick boss on a thin wall will create a visible sink mark on the surface opposite the boss. This is because the boss acts as a reservoir of hot plastic that continues to shrink long after the wall has set. That’s why we spend so much time with our clients, like Alex, using techniques like coring out thick sections or using ribs for support instead of just making walls thicker. It’s all about managing how the plastic cools.
The Consequences of Non-Uniform Walls
When you violate the rule of uniform wall thickness, you are inviting a host of molding defects. Let’s look at the main culprits:
- Sink Marks: These are small depressions or divots on the surface of the part. They occur on the surface opposite a thick section (like a rib or a boss). The thick section acts as a heat mass, and as it cools and shrinks, it pulls the still-soft surface of the main wall inward.
- Voids: These are air bubbles trapped inside a thick section of the part. This happens when the outer surface of the thick section solidifies first, trapping molten plastic inside. As this trapped plastic cools and shrinks, it creates a vacuum, forming a void. Voids can severely compromise the structural integrity of a part.
- Warpage: This is when the part twists or bends out of its intended shape as it cools. It’s caused by the internal stresses built up from differential cooling rates between thick and thin sections. One part of the component is literally pulling against another, causing the whole thing to deform.
How to Achieve Uniform Wall Thickness in Practice
It’s easy to say "keep walls uniform," but designs often require features like mounting bosses, support ribs, and snap-fits. The key is to design these features intelligently to minimize their impact on wall thickness.
Cored-Out Sections
Instead of designing solid, thick areas, you should "core them out," leaving a hollow section with uniform walls. This maintains the part’s shape and size while eliminating the mass of plastic that would cause sink and voids.
Ribs Instead of Thick Walls
If you need to add strength to a part, use ribs instead of making the entire wall thicker. Ribs provide excellent support with minimal material. However, even ribs must follow a rule:
- Rib Thickness Rule: The thickness of a rib at its base should be no more than 50-60% of the nominal wall thickness it is attached to. This prevents the rib from acting as a thick section and causing a sink mark on the opposite side.
Gradual Transitions
If you absolutely must transition from a thin wall to a thick wall, the change should be gradual, not abrupt. Using smooth chamfers or radii to blend the sections helps manage the flow of plastic and reduces stress concentrations. A sharp corner between a thick and thin section is a primary site for warpage.
By following these principles, you can design strong, functional parts that are also easy to manufacture reliably and without cosmetic flaws.
Conclusion
Mastering design for manufacturability isn’t about memorizing a hundred rules. It boils down to understanding two core principles: making it easy for the part to exit the mold (draft) and ensuring the part cools evenly (uniform wall thickness).
Get these right, and you’ll prevent most common molding defects.
