Struggling to eliminate defects and control your production costs? You’ve adjusted injection pressure and speed, but your parts still have sinks, warps, or poor finishes. It’s frustrating when one small change creates a dozen new problems, delaying your project and straining your budget.
Yes, mold temperature is one of the most critical parameters in injection molding because it directly influences resin flow, cooling rate, and final part quality. It interacts with every other setting, including injection pressure, speed, and time. Getting it right is key to achieving consistent, high-quality results and an efficient process.

Getting the parameters right in injection molding feels like conducting an orchestra. Every instrument has to be in tune and play at the right time. Mold temperature isn’t just one instrument; it’s the conductor setting the tempo for the entire performance. It influences everything from how the plastic flows into the mold to the final look and feel of the part. Over my years in this industry, I’ve seen how a few degrees’ change in mold temperature can make the difference between a perfect part and a pile of scrap. Today, I want to break down these complex relationships to help you master your molding process. Let’s dive in.
How Does Mold Temperature Interact with Injection Pressure?
Are you constantly fighting high injection pressures that stress your machines and molds? This can lead to premature wear and tear, and even flash on your parts. It feels like you’re forcing the process, which is never a good sign for consistency or equipment longevity.
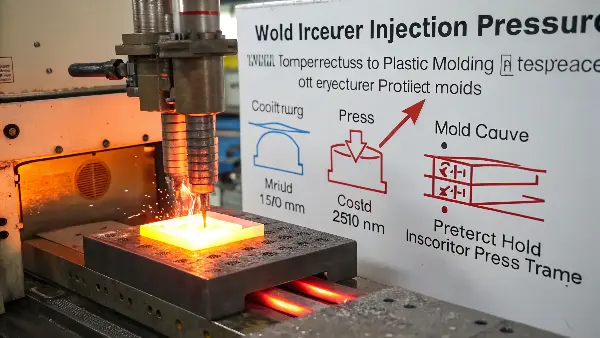
A higher mold temperature reduces the amount of injection pressure needed to fill the cavity. This is because the warmer mold walls keep the plastic melt fluid for longer, lowering its resistance to flow. This allows you to fill the part completely with less force, reducing stress on both the mold and the molding machine.

I remember working on a project for a medical device company. The part was complex, with some very thin wall sections. The initial trials required extremely high injection pressures to fill the part completely, and we were still seeing short shots intermittently. The instinct for many is to just crank up the pressure or the melt temperature. But pushing the pressure to the machine’s limit is a risky game. It can cause flash, where plastic escapes the mold, and puts a huge amount of stress on the mold components, shortening its life. Here at CAVITYMOLD, we took a more controlled approach.
Instead of just forcing it, we focused on the mold temperature. By increasing the mold temperature by just 15°C, we saw a dramatic change.
The Dynamics of Flow and Force
The plastic melt starts cooling the second it touches the colder mold walls, forming a "frozen layer." This layer narrows the flow channel, meaning the machine has to push much harder to get the rest of the material into the cavity. A warmer mold slows down the formation of this frozen layer. The plastic stays liquid for longer, so it flows more easily into every corner and detail. As a result, the injection pressure required to fill the mold drops significantly. This is not only better for the machine and mold but also leads to a more stable and repeatable process.
Mold Temperature vs. Melt Temperature
Here’s a key insight I’ve learned: raising the injection (melt) temperature also reduces viscosity, but raising the mold temperature is often a better tool for managing pressure. Why? A higher melt temperature can degrade some sensitive materials, while a well-controlled, hotter mold provides a more gentle and uniform way to improve flow.
Here’s a simple table to show the primary effects:
| Parameter Change | Effect on Viscosity | Effect on In-Mold Pressure | Effect on Surface Stress |
|---|---|---|---|
| Increase Melt Temp | Significant Decrease | Significant Decrease | Minor Decrease |
| Increase Mold Temp | Moderate Decrease | Moderate Decrease | Significant Decrease |
As you can see, while both help, they have different strengths. For reducing the sheer force needed, melt temperature has a slight edge. But for the health of the part and mold surface, mold temperature is king.
What’s the Connection Between Mold Temperature and Resin Viscosity?
Are your parts failing to fill completely, especially in thin sections or complex geometries? This frustrating issue, known as a short shot, is often caused by the plastic becoming too thick, or viscous, before it can fill the entire mold. It leads directly to scrap parts.
A higher mold temperature keeps the plastic melt in a less viscous state as it travels through the mold cavity. Warmer mold walls prevent the plastic from cooling and solidifying prematurely. This lower viscosity allows the resin to flow more easily and fill intricate details and thin-walled sections of the part successfully.

Rethinking how we approach viscosity is crucial. Many people think of viscosity as a fixed property of the material. In reality, it’s a dynamic property that we can influence greatly during the molding process. The temperature of the plastic as it’s injected is the primary driver of its initial viscosity. But the mold temperature determines how long that low-viscosity state is maintained. You can inject the hottest, most fluid plastic in the world, but if it hits a cold mold, it will instantly thicken and stop flowing.
On a project involving a consumer electronics housing with a very fine grille pattern, we saw this firsthand. The initial settings resulted in incomplete grilles every time. The plastic was freezing before it could fill those tiny features.
Maintaining the Flow State
The key is to think of mold temperature as a tool to manage the resin’s journey. When the molten plastic, let’s say at 220°C, is injected into the mold, it meets the steel walls. If the mold is cold, say at 30°C, the temperature difference is huge. The plastic touching the walls freezes almost instantly, creating a solid layer that makes the flow path smaller and smaller. The plastic in the center has to push through this narrowing tunnel, and its viscosity increases rapidly as it also loses heat.
Now, imagine that same mold is heated to 80°C. The temperature difference is much smaller. The plastic doesn’t freeze on contact. It stays fluid for much longer, allowing the flow front to advance smoothly and with less resistance. This sustained low viscosity is what allows it to fill every last detail of the part, from sharp corners to delicate textures.
The Role of Material Choice
Of course, this is highly dependent on the type of plastic you’re using.
- Amorphous plastics like ABS and polycarbonate have a wider processing window and are more forgiving.
- Semi-crystalline plastics like nylon and polypropylene are much more sensitive. They have a sharp melting point and will "snap" from a liquid to a solid state very quickly if the mold is too cold, making mold temperature control absolutely critical.
We always check the material supplier’s datasheet, which provides a recommended range for mold temperature. Starting in the middle of that range is a good practice, but you almost always have to fine-tune it based on the specific part geometry and cycle time requirements.
Why Does Mold Temperature Influence Cooling Time and Cycle Time?
Are you under constant pressure to increase output and shorten production cycles? It’s a common challenge. But speeding things up carelessly can lead to deformed parts and quality issues, completely defeating the purpose. Finding the right balance is essential for profitability.
Mold temperature is the primary factor controlling the cooling phase of the injection cycle. A higher mold temperature requires a longer cooling time for the part to solidify enough for ejection. This directly increases the overall cycle time. A lower mold temperature speeds up cooling but can introduce other quality problems.

In manufacturing, time is money. The total cycle time—from mold close to mold close—determines your factory’s output. The cooling phase often takes up the largest portion of that cycle, sometimes over 50%. So, it’s the most obvious place to look for efficiency gains. However, this is a delicate balancing act. I’ve seen teams get fixated on shaving off seconds from the cooling time by running the mold as cold as possible. While this does eject parts faster, it can be a classic case of "more haste, less speed."
The parts might come out faster, but they could be warped, brittle, or have high internal stresses. These parts may fail quality control checks or, even worse, fail in the hands of the end-user. The cost of scrap and returns quickly eats up any savings from a faster cycle.
The Trade-Off: Speed vs. Quality
The goal is to find the "sweet spot" where the part cools just enough to be dimensionally stable and hold its shape upon ejection, without spending unnecessary time in the mold.
-
Hot Mold:
- Pros: Better surface finish, lower internal stress, better filling of complex features.
- Cons: Longer cooling time needed, which increases the cycle time and reduces parts per hour.
-
Cold Mold:
- Pros: Shorter cooling time, faster cycle, higher output.
- Cons: Higher risk of defects like warpage, sink marks, and brittleness. Can cause short shots.
Finding the Optimal Cooling Time
The optimal temperature depends heavily on the material and the part’s thickest wall section. The heat has to be removed from the core of that thick section before the part is stable. For a project manager like Alex, this is a critical calculation. We use Moldflow analysis during the design phase to simulate the cooling process. This helps us predict potential hot spots and design effective cooling channels within the mold to ensure uniform and efficient heat removal. For example, if a part has one very thick boss, we might design a dedicated cooling circuit just for that area to speed up its solidification without having to over-cool the rest of the part. This allows us to optimize the cycle time without compromising the integrity of the final product.
Can Mold Temperature Control Part Quality and Surface Finish?
Do your finished parts suffer from cosmetic flaws like flow lines, dull spots, or sink marks? These defects can lead to rejection by your client, especially for consumer-facing products where appearance is paramount. It’s a sign that the molding process isn’t fully under control.
Absolutely. A higher mold temperature generally produces a better surface finish and improves overall part quality. It allows the plastic to replicate the mold surface texture more accurately, resulting in a higher gloss finish. It also reduces internal stresses, which minimizes warpage and enhances the strength of weld lines.

The surface of the mold is a perfect mirror of the part you want to create. But getting the plastic to copy that surface perfectly is the real challenge. Think of it like trying to take an impression in cold, stiff clay versus soft, warm clay. The warm clay will capture every tiny detail, while the cold clay will give you a rough, incomplete copy. It’s the same principle with plastic. A cold mold causes the outer layer of the plastic to freeze instantly upon contact. This "frozen skin" is under a lot of stress and doesn’t have time to settle into the micro-texture of the mold steel.
This leads to a number of common defects that I see all the time.
Common Defects Linked to Cold Molds
- Sink Marks: These occur in thick sections of a part. The outside skin solidifies while the inside is still molten. As the inside core cools and shrinks, it pulls the outer surface inward, creating a visible depression. A warmer mold allows packing pressure to be effective for longer, pushing more material into the thick section to compensate for this shrinkage.
- Weld Lines: Where two flow fronts of plastic meet, they need to fuse together properly. If the mold is too cold, the flow fronts are already partially solidified when they meet, creating a weak, often visible line. A hotter mold ensures the fronts are still fully molten, allowing them to merge into a strong, invisible seam.
- Poor Surface Finish: For a high-gloss part, the plastic needs time to flow smoothly against the polished mold surface. A cold mold results in a dull or "orangey" texture because the flow is turbulent and freezes too quickly. Based on the insight I shared earlier, raising the mold temperature is the most effective way to reduce this surface stress. On one customer’s project for a high-end coffee machine housing, achieving a perfect "piano black" finish was impossible until we optimized the mold temperature, running it much hotter than for a standard industrial part.
Ultimately, the mold temperature gives the plastic molecules the time they need to relax and arrange themselves in a low-energy state before they are frozen in place. This results in a part that is not only cosmetically pleasing but also stronger and more dimensionally stable.
Conclusion
In the end, mold temperature is not just another setting; it’s a foundational parameter that influences every aspect of the injection molding process. Mastering its control is essential for achieving both efficiency and quality, turning potential problems into profitable, perfect parts you can be proud of.
